
4 Cheap Make-Ahead Snacks for the Whole Family
What do apple slices, baby carrots, and (yawn) boiled eggs have in common? They’re cheap and healthy, but also boring. If you and your family are tired of the same old grub or you want to add variety to the kids’ after school snacks, then check out these four easy make-ahead snack recipes that’ll add spice to your weekly meal prep. These aren’t your average cheap healthy snacks!

- 1. Garden Veggie Egg Cups
Prep time: 40 minutes
Don’t skip breakfast! Buy yourself some snooze time with these make-ahead egg cups. They’re cheesy, savory, and a great way to get some veggies in first thing in the morning. Plus, making them in a muffin tin means you get the convenience of a muffin and the nutrition of an omelet in one protein-packed bite. Go, you!
Ingredients:
- 6 large eggs
- 2 bunches, spinach
- 1 red pepper, chopped
- ½ yellow onion, chopped
- ¾ cup cheese, shredded
- non-stick cooking spray
- salt and pepper to taste
Instructions:
- Preheat oven to 350˚ F.
- Place cupcake liners in muffin tin OR coat the tin with non-stick cooking spray.
- Sautée onions, peppers, and spinach in a small pan over medium heat until spinach wilts.
- Add eggs, cheese, salt and pepper to a bowl and whisk.
- Place sauteed veggies in the muffin tin, distributing them evenly across 6-8 cups.
- Pour egg and cheese mixture over veggies, filling each cup about ¾ of the way full.
- Mix veggies and eggs with a fork.
- Bake for about 20 minutes.
- Serve immediately or allow to cool before refrigerating.
Recipe notes: To reheat, microwave egg cups in 30-second intervals. This protein-filled portable snack will keep for up to five days when refrigerated in an airtight container. Want to try a different egg cup ingredient combo? Check out other egg muffin ideas.
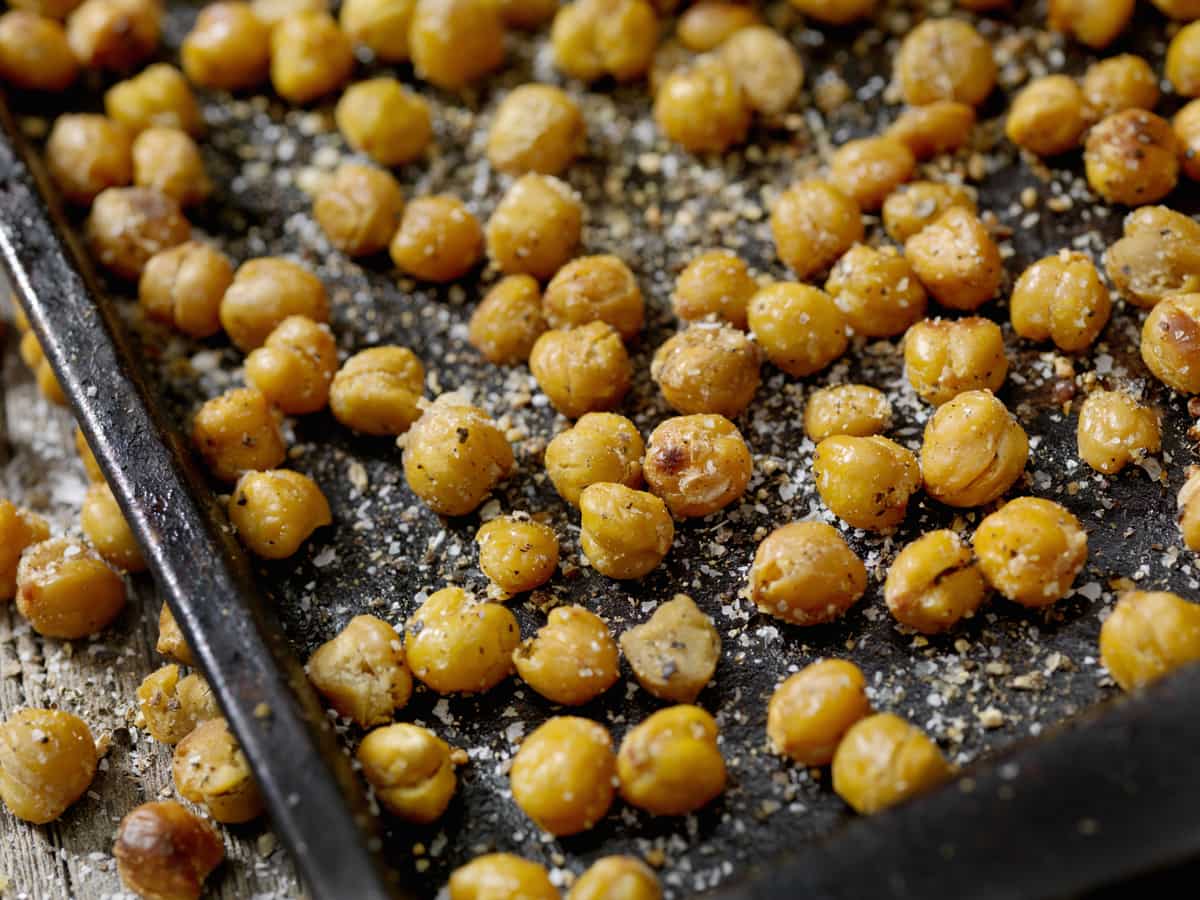
- 2. Crunchy Chili Lime Chickpeas
Prep time: 35 minutes
Hungry kids and parents agree—the best craving-calming snacks are crispy and full of flavor. They also require no silverware and often come straight out of store-bought chip bags, covered in fake cheese or loads of sodium. However, crunchy munchies don’t have to be unhealthy. Make these roasted chickpeas as a potato chip-alternative for school lunches or as a crispy topping for green salads, and say “goodbye” to the chip aisle—for good.
Ingredients:
- 1 can chickpeas, drained and rinsed
- 1 tbsp olive oil
- 1 teaspoon chili powder
- 1 lime
- ½ teaspoon salt
Instructions:
- Preheat oven to 375˚ F.
- Coat cookie sheet with non-stick spray or line with aluminum for easy cleanup.
- Whisk olive oil, chili powder, lime juice, and salt.
- Add drained and rinsed chickpeas to the spice and oil mixture, tossing them with a fork until well-coated.
- Roast for 25 minutes or until crispy (cooking times vary depending on your oven).
- Allow to cool and store in a semi-ventilated container at room temperature (a plastic container with a loosely-fitted lid, for example).
Recipe notes: Roasted chickpeas will keep at room temperature for up to four days. However, depending on humidity and other environmental factors, they may start to lose their “crispiness.”
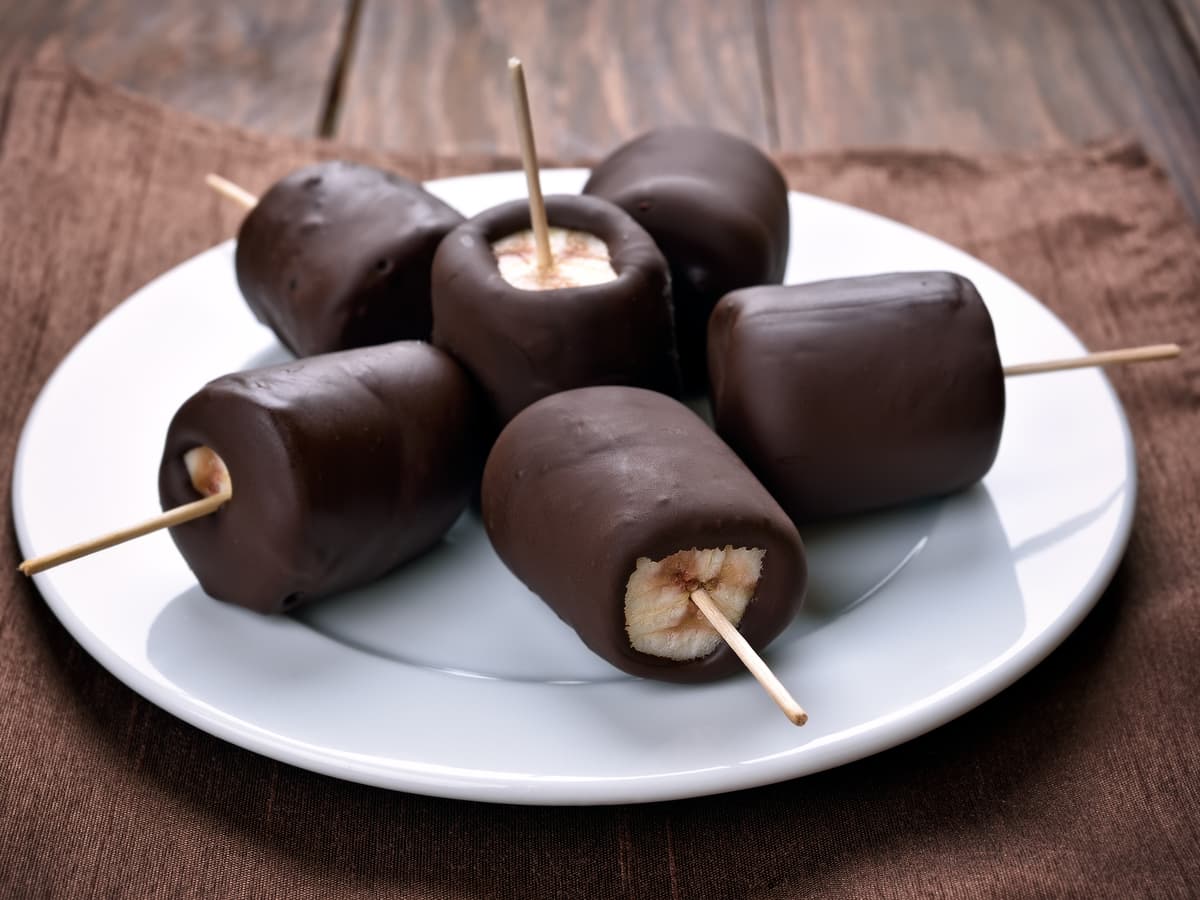
- 3. Chocolate Covered Banana Bites
Prep time: 20 minutes
Need something for that tooth? Nip midnight sweet tooth cravings in the bud with a fruity and chocolate-y treat your kids are guaranteed to love. Plus, these frosty cocoa-coated banana bites get bonus points for giving you the potassium boost you need to conquer any back-to-school blues.
Ingredients:
- 2 cups chocolate chips
- 2 tbsp coconut oil
- 3 bananas
Instructions:
- Line a cookie sheet with parchment or wax paper.
- Slice the bananas into bite-sized pieces and place them on the cookie sheet in a single layer.
- Put sliced bananas in the freezer while you prep the chocolate.
- Melt the chocolate in a water bath: fill a saucepan with an inch of water and placing a metal or glass bowl in the water. Then, add the chocolate chips to the bowl and bring the water to a simmer.
- Stir the chocolate as it melts.
- Add the coconut oil to the melting chocolate, mixing well.
- Remove the coconut oil-chocolate mix from the heat.
- Take cold bananas out of the freezer and dip them in melted chocolate, using a fork to coat them.
- Line coated-bananas in a single layer on the cookie sheet and allow them to freeze for at least five hours.
- Once frozen, transfer the banana bites to an airtight freezer container for long-term storage.
Recipe notes: Eat frozen. Banana bites will keep up to three months in the freezer. Avoid mushy banana bites by storing in a spacious and reliable freezer, like an Amana top-freezer fridge.
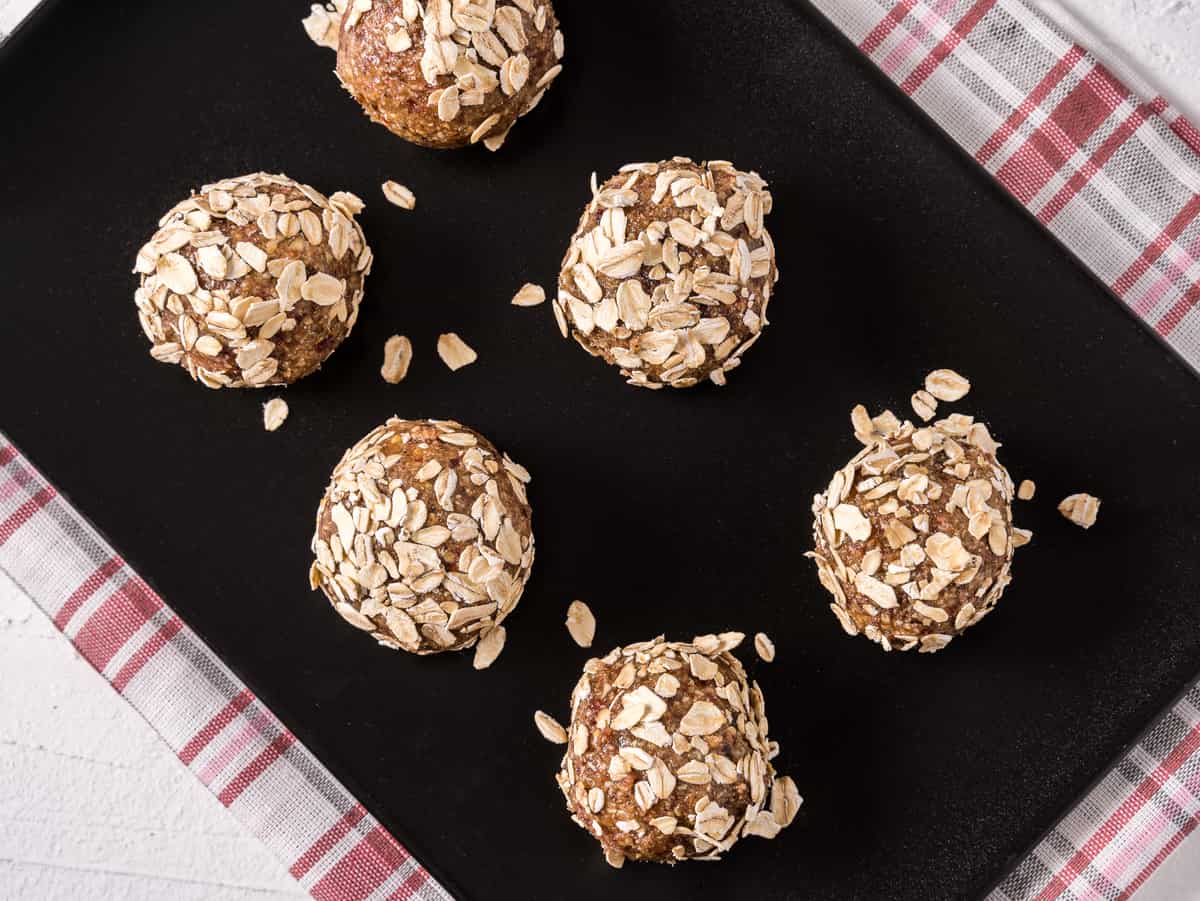
- 4. Dried Fruit Energy Bites
Prep time: 20 minutes
“Don’t play with your food,” they said, but they didn’t have this no-cook energy bite recipe. Ditch expensive protein bars with one of our favorite sweet yet wholesome snacks that even your toddler can help you make. Psst… add chocolate chips to make this snack extra tasty.
Ingredients:
- 2 ½ cups rolled oats
- ¾ cup creamy peanut butter or almond butter
- ½ cup chopped dried cherries, cranberries, or fruit of choice
- 1 tsp vanilla extract
- ¼ tsp salt
- ½ cup chocolate chips (optional)
- ¼ cup chia seeds (optional, for an extra fiber boost)
Instructions:
- Mix all ingredients in a bowl until you get a doughy paste.
- Place dough in the fridge for an hour.
- Once cooled, roll dough into bite-sized balls.
- Store in an airtight container in the fridge.
Recipe notes: Freeze for up to three months or keep in the fridge for up to one week.
Ready, Set, Snack!
Ready to upgrade your snack game from boiled eggs to cheesy egg cups? Perhaps it’s time to upgrade your fridge game, too! Get affordable payments on roomy rent-to-own refrigerators at your nearest Rent-A-Center.