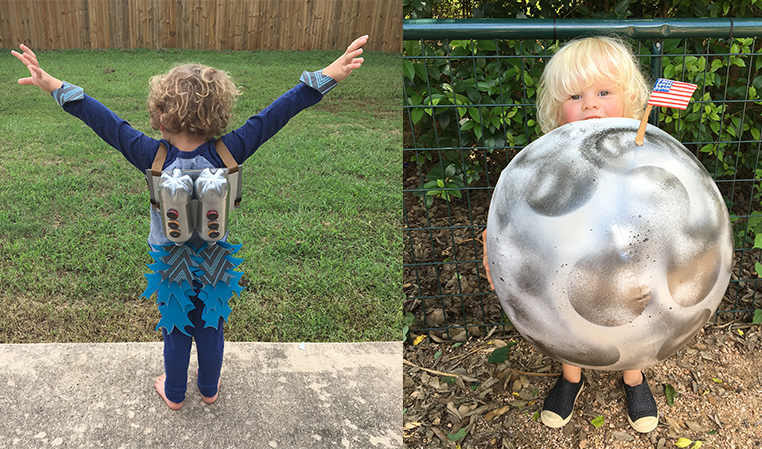
Two Stellar Halloween Costume DIYs for Kids
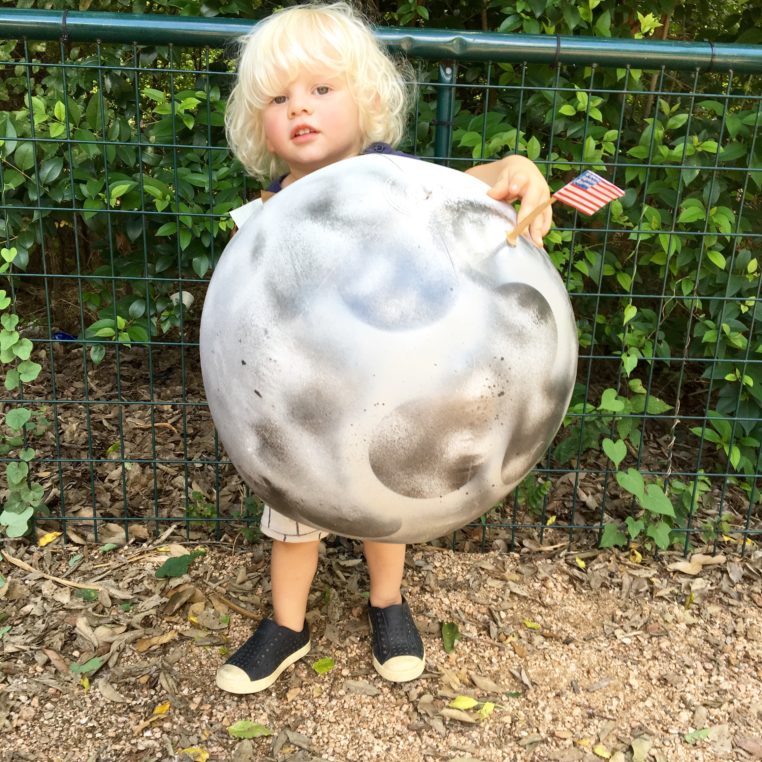
No need for your kiddos to cool their jets this year! Instead, craft a rocket-fueled jet pack from items found around the house (and a few inexpensive things from any hardware store). And what good is a Rocket Man without his Moon, baby? Craft a cutesy wearable moon out of an exercise or beach ball, primer spray paint, some duct tape, and a little imagination of your own for a coupled costume that’s truly out of this world.
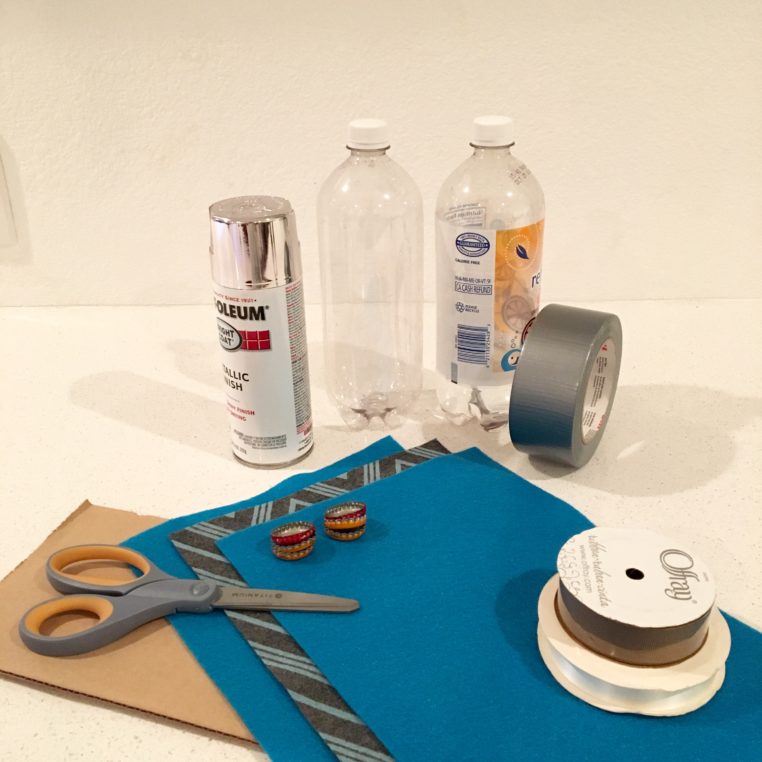
What you will need to make the jet pack:
- 2 empty plastic soda bottles (1 liter or 1 quart, depending on the size of your kiddo)
- 1 cardboard square for anchoring the bottles
- 1 yard of ribbon
- 2-3 felt sheets in the color of your choice (we went with royal blue and a blue striped pattern)
- Silver/chrome spray paint
- 6 bottle caps
- Duct tape
- Hot glue gun and sticks
- Scissors or utility knife
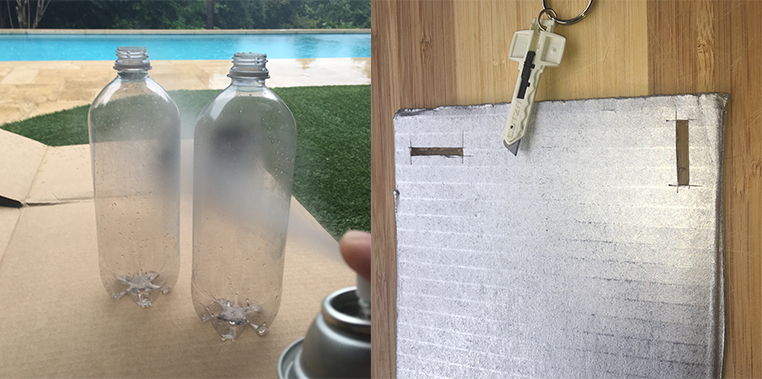
1. Cut a cardboard square to fit about the width of your kid’s back, leaving just enough room to hold the bottles and straps you’ll soon fashion out of ribbon. Cut 4 small slits — 2 horizontally at the top and 2 vertically at the bottom. In a well-ventilated area, spray the cardboard square and soda bottles in a sweeping motion, about 4-5 inches from each to avoid drips.
Tip: If you don’t want spray paint in your fingernails, you may want to wear gloves.
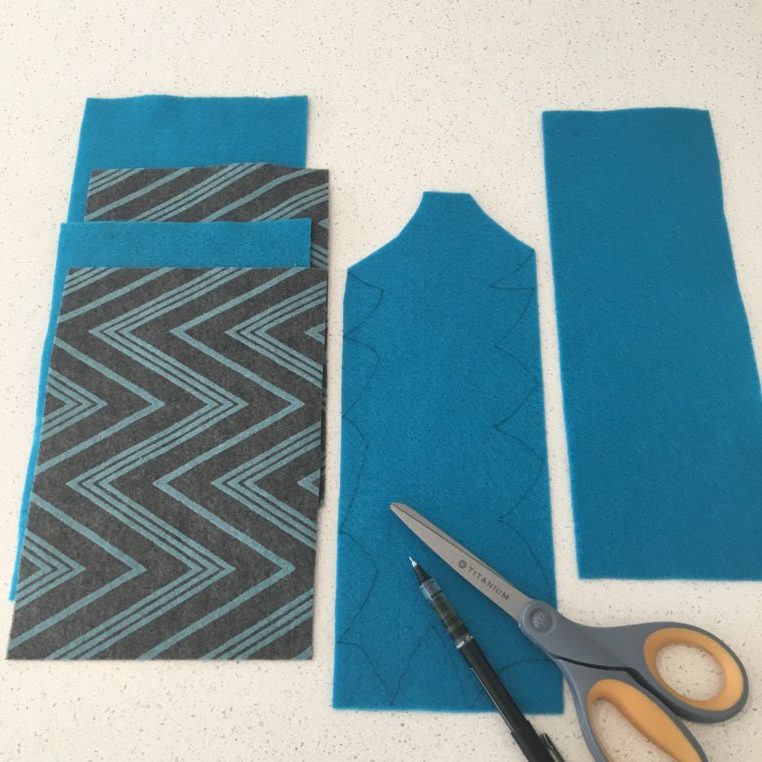
2. Cut one felt sheet vertically, and one (or two) horizontally. You’ll layer them; one end will be hot glued into the nozzle of your bottle, and the other will stream out as “flames.” Cutting your felt sheets to different lengths will give your flames a real 3-D effect. Use a pen to draw a “Christmas tree” pattern starting from the top, then cut.
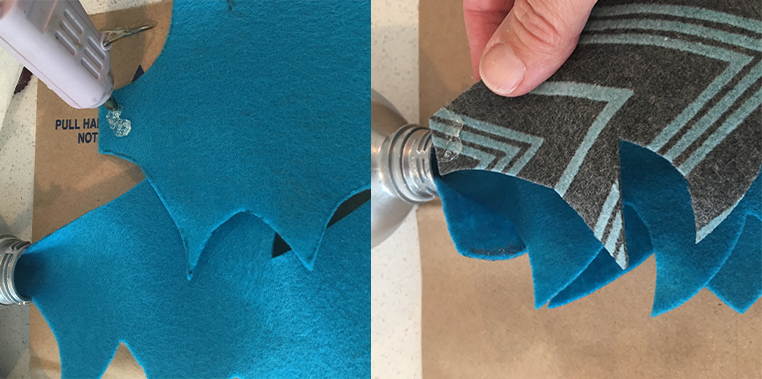
3. Starting with the longest flame that will sit at the backside of your jet engine, place a small amount of hot glue onto the underside of felt tip. Roll it slightly at top and insert it into the bottle opening. Repeat for all flames.

4. Once your engines have their fire, put a line of hot glue along the side of one bottle. Stick (and hold) it to the other bottle, making sure your flames are in the proper position. Once dry, flip the bottles over and apply 1-2 strands of duct tape to sturdily secure them together. Place a few globs of hot glue onto your cardboard backing, then stick bottles into place.
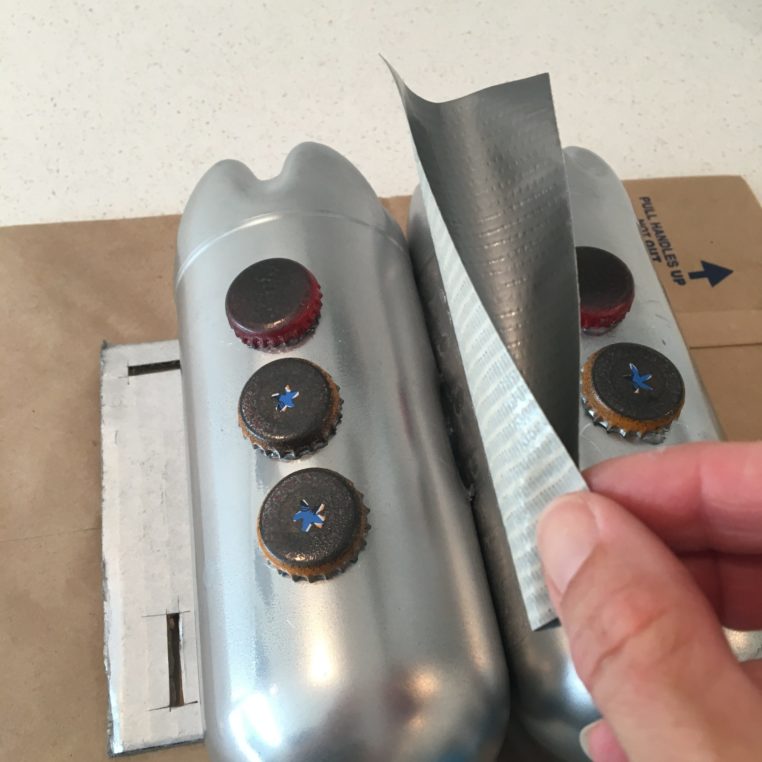
5. Now it’s time to add the command buttons! Spray paint or decorate 6 bottle caps however you like, and apply a few dabs of hot glue to the edge rim underneath. Gently place in a row down each bottle front. Apply a small strip of duct tape to the middle of the jet pack to hide your glue bits and keep from sticking the bottles together.
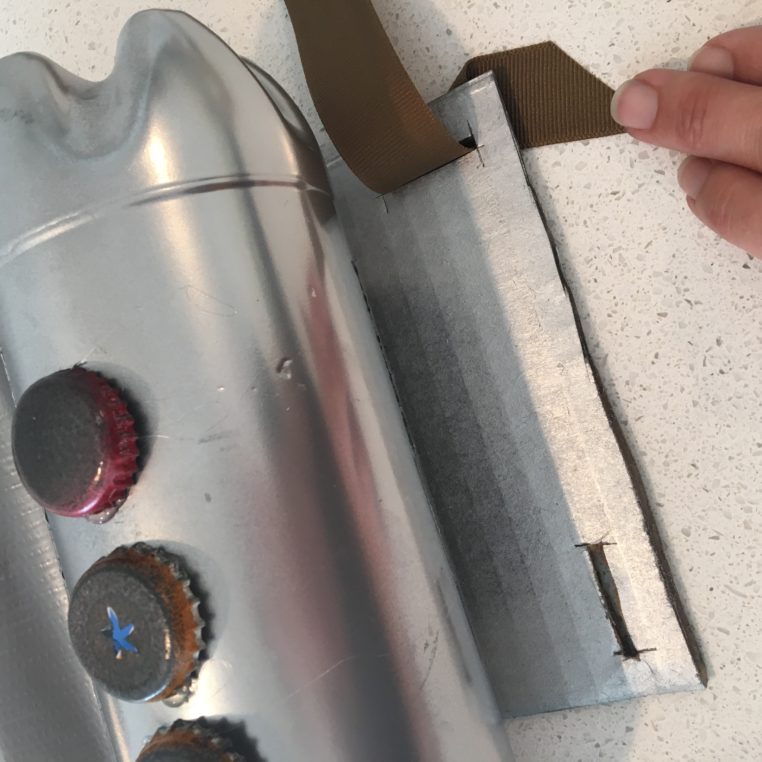
6. Once your jet pack is secure, it’s time to add the straps. Cut two ribbons to about 24 inches long. Thread the ribbon through one top corner first, then apply hot glue to the inside edge of the ribbon and stick it to itself. Once both top ribbons are secure, you’ll want to test the jet pack on your little astronaut. Thread each bottom strap through bottom slits and mark a cut line. Remove the pack from your kid, cut at the marked lines, hot glue the inner edge, and then stick the ribbon onto the glue.
Tip: It’s best to test the jet pack on your child before you cut strap length.
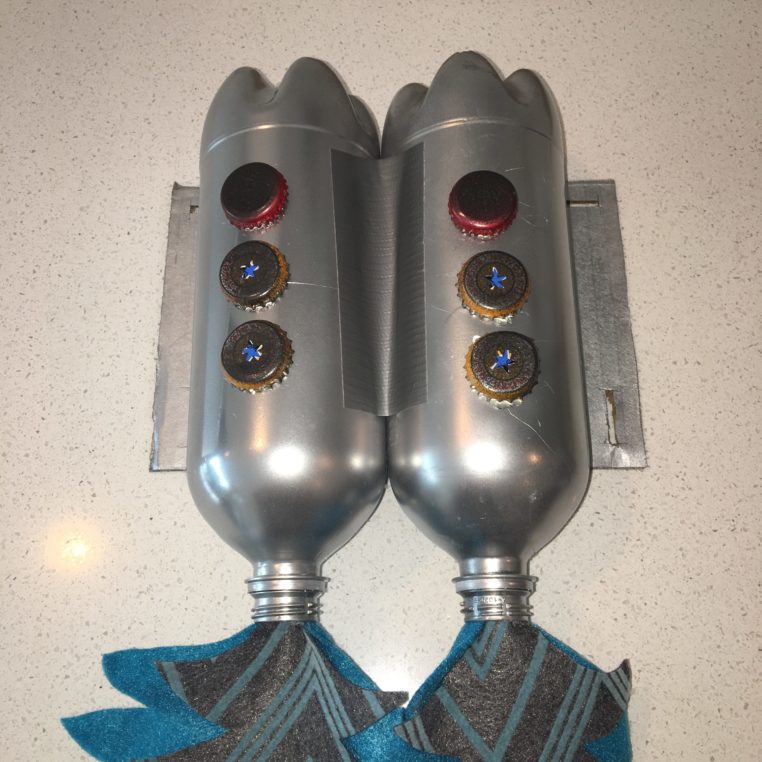
Voila! One twin-engine, gravity defying jet pack for your space kid that’s also a super cute and inexpensive Halloween costume he or she will be over the moon to take for a spin.
Now, let’s go to the moon!
Choose a ball that’s a little bigger than the width of your little’s belly. Give it a little pizazz, and he or she will be ready to orbit the neighborhood for tricks and treats on Halloween night.
What you will need to make the moon:
- 1 deflated exercise or beach ball that’s a little bigger than the width of your child’s belly
- Primer paint in white, light gray, and dark gray
**IMPORTANT: Be sure that your paint will cover plastic. - 1 yard of ribbon
- 1 index card
- 1 small wooden stick (to serve as the base of the flag)
- Red and blue markers
- Scissors
- Hot glue gun and sticks
- Duct tape
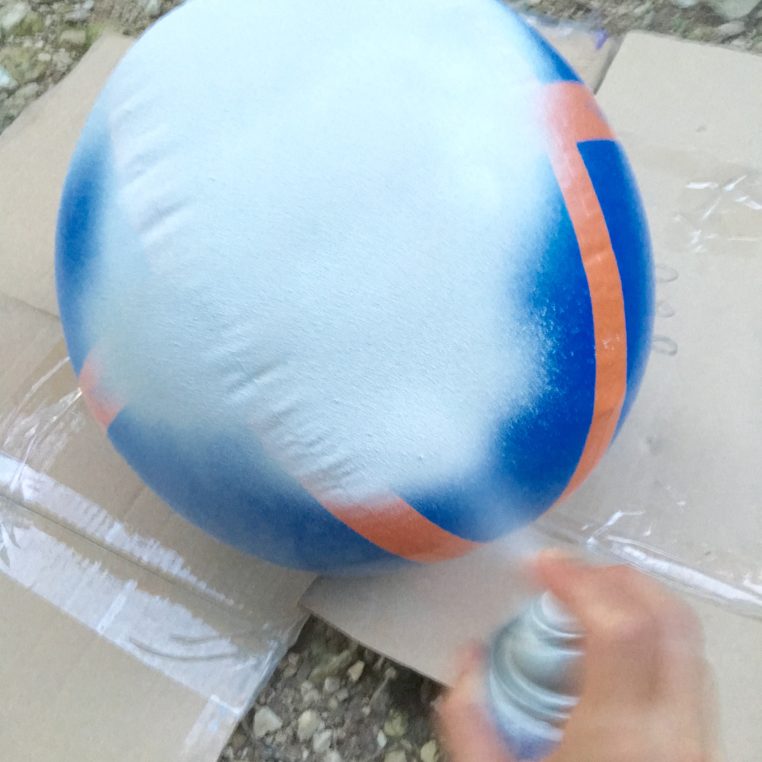
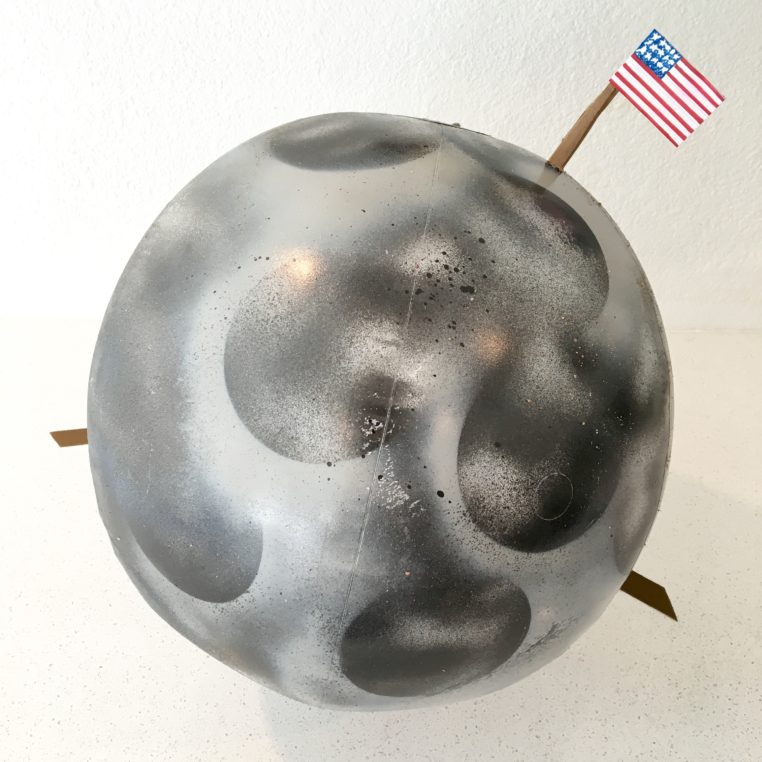
1. In a well-ventilated area or outside, spread out a tarp or some cardboard and begin spraying your first coat of white using a sweeping motion about 4-6 inches from the ball’s surface. (Think outer space — the moon’s surface is porous and various shades of gray.) You don’t have to cover the whole surface perfectly.
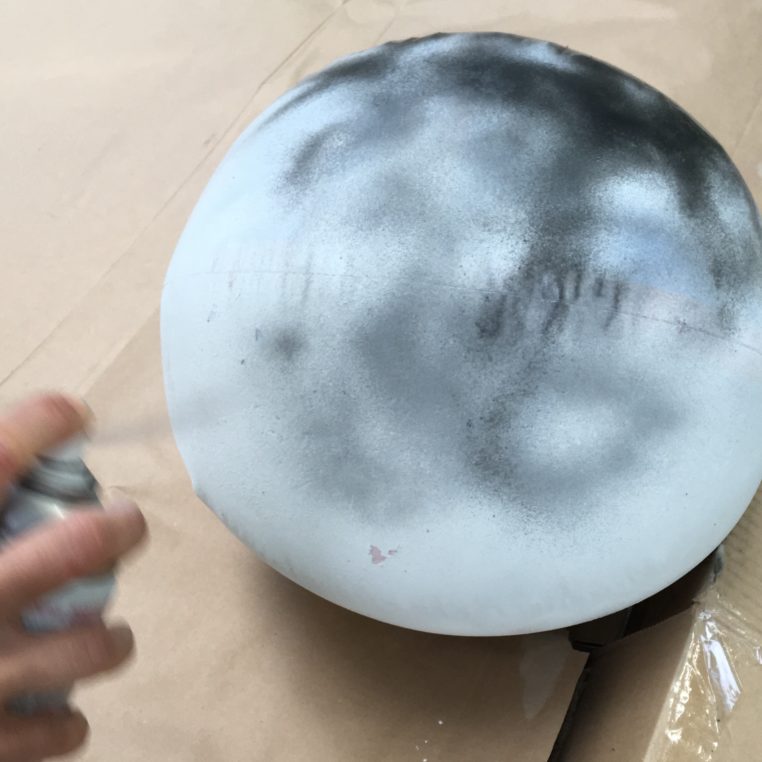
2. Once the top coat is dry (it may take a while as the paint dries on the pliable plastic ball, which is why it’s especially important to use a paint that covers plastic), come back over the ball with the darker gray. Use small, circular motions as you cover, leaving some of the white underneath. Think craters!

3. To really make your moon pop, use the edge of a cup or round object and place it slightly above the moon’s surface before spraying with the lighter gray around the lip of one side of the cup. As you move the cup around the ball, spray on the same side of the cup. This will make a great edge while you’re making craters.
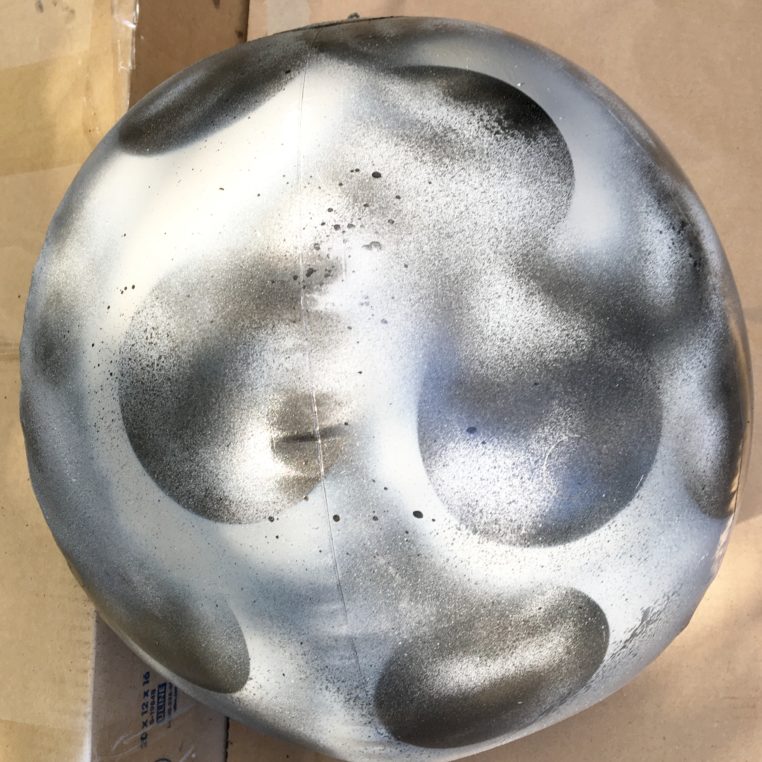
4. The good news is that there aren’t really any mistakes to be made here! Layering on various shades of paint will give your moon a 3-D look, but be sure to let your moon dry between coats. Spritz a few darker dots here and there by making quick bursts of paint over your moon.
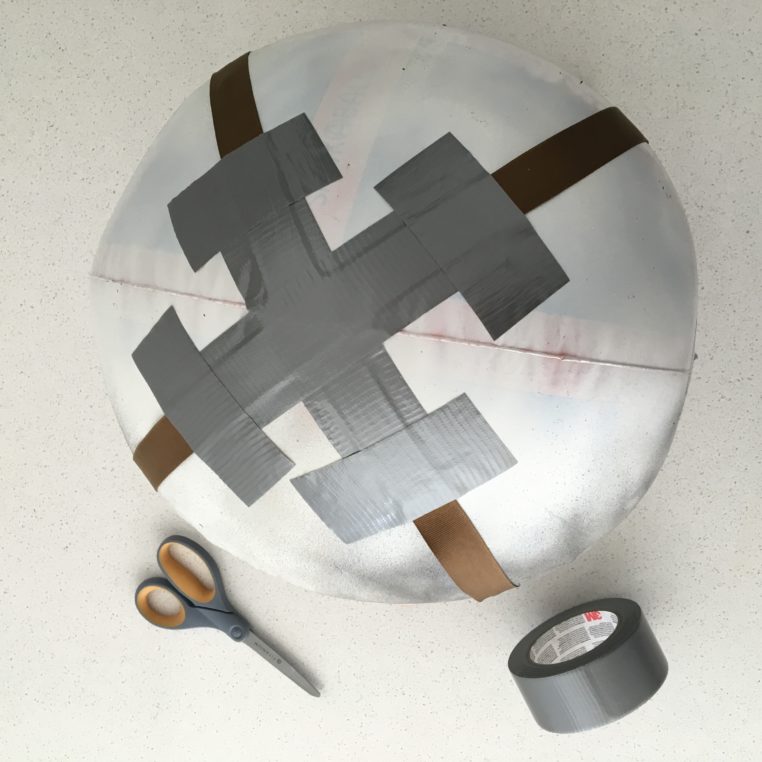
5. Once dry, take two strands of ribbon cut to approximately 24-32 inches long, and make a criss-cross pattern at the center. Use a few pieces of duct tape to secure them to the back of your moon on the side that will rest on your kid’s tummy, and consider measuring the ribbon length to your child’s exact measurements by having them stand in at this time.
Tip: If you don’t have helping hands, prop your moon up with the spools of the ribbon.
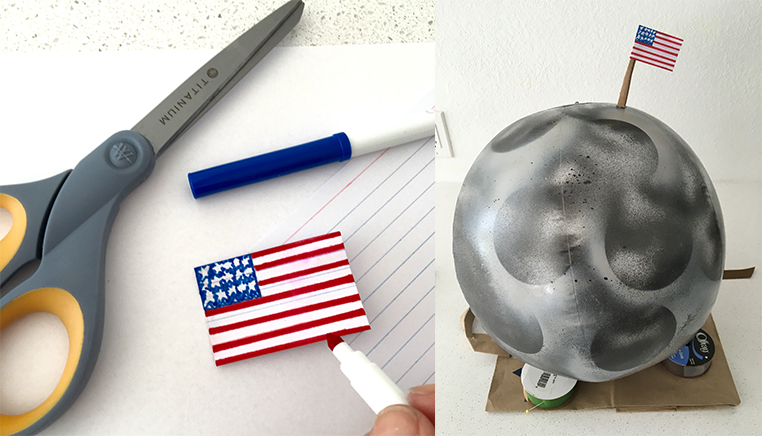
6. Now, fly the flag! Cut a piece of an index card into a rectangular shape that you can fold around a cardboard stick base. Color one side with red stripes and a blue corner square, leaving white dots for stars. Hot glue the top sliver of cardboard to the stick flagpole, and place the stick in the fold of your flag. Hot glue the other side of your split flagpole base to the ball, and hold until it dries.
Now, it’s time for your little moon to head into orbit with your Space Explorer!