


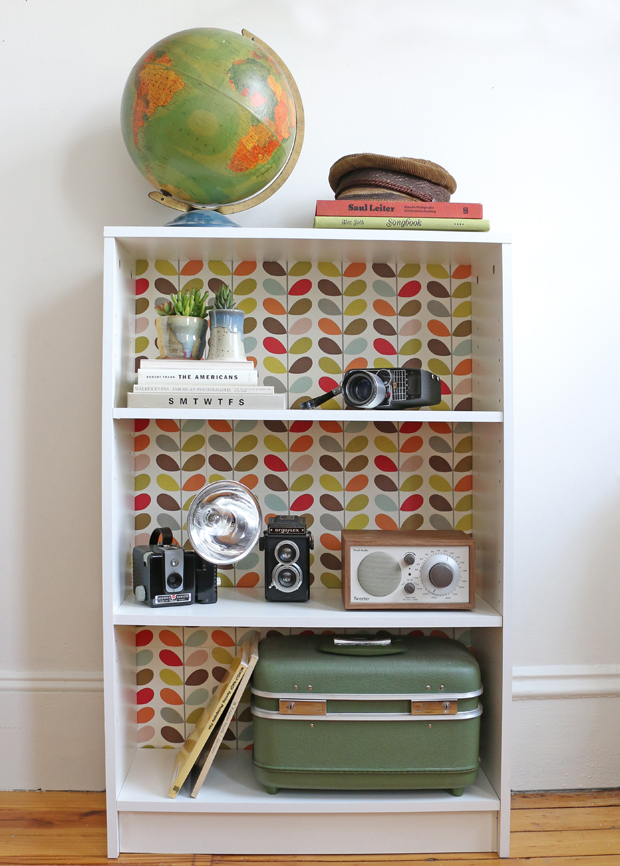

Wallpapering the back panel of a bookshelf is an easy way to turn plain shelving into the brightest, smartest piece in a room. We show you how in seven easy steps.
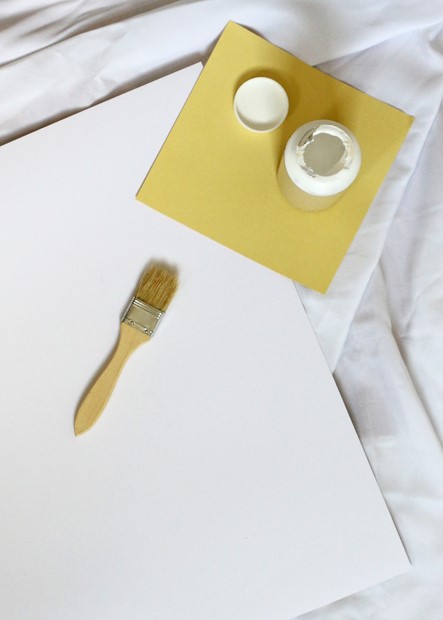
What you will need:
- Bookcase
- Old sheet
- Measuring tape
- Ruler
- Wallpaper
- Scissors
- Wallpaper glue
- Paintbrush
- Craft knife
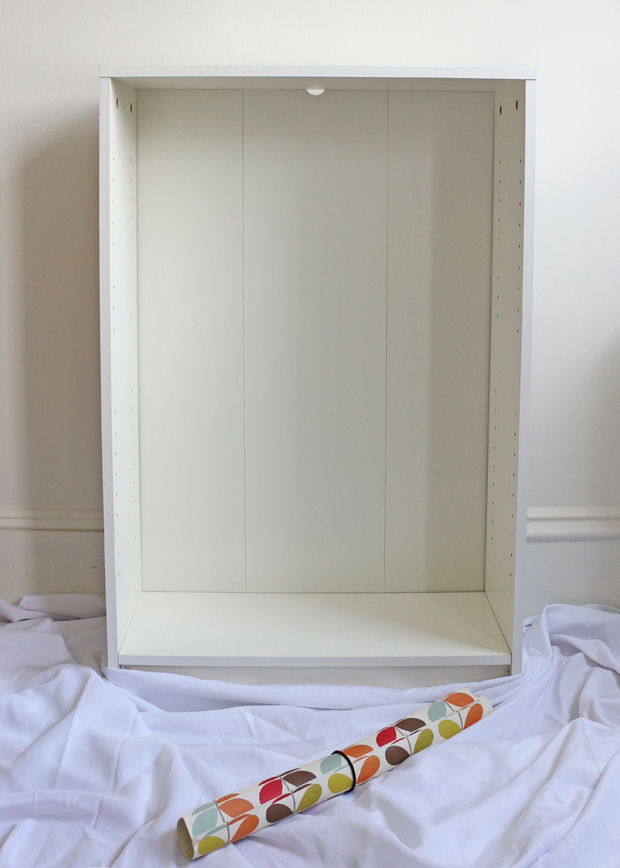

Step 1: Prepare your bookcase. Remove books and other items from the shelves. Detach removable shelves and wipe down the bookcase to remove dirt or dust. Put down an old sheet or towel to prevent glue from getting on your floor.
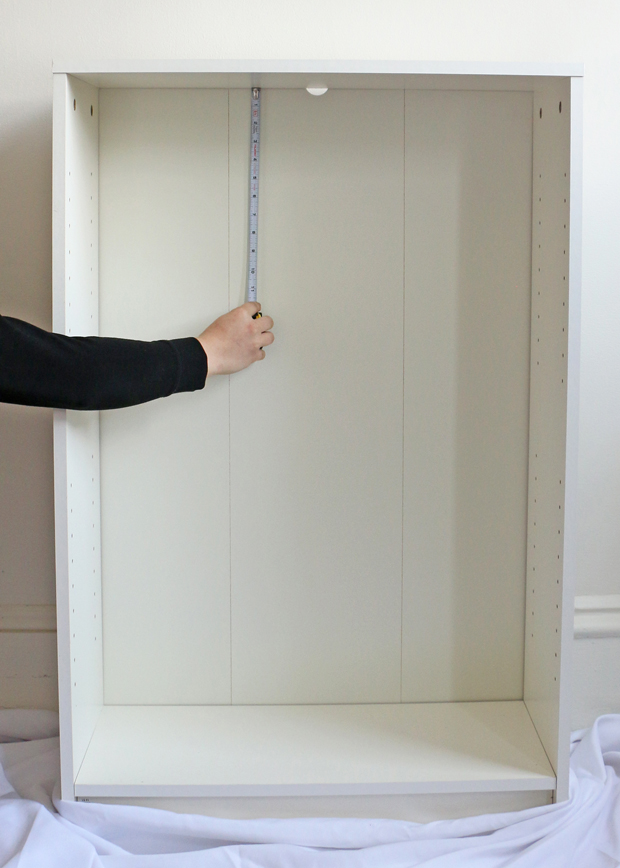
Step 2: Use a tape measure or ruler to measure the length and width of the inside of the back surface of your bookcase. Add 2 inches to the length.
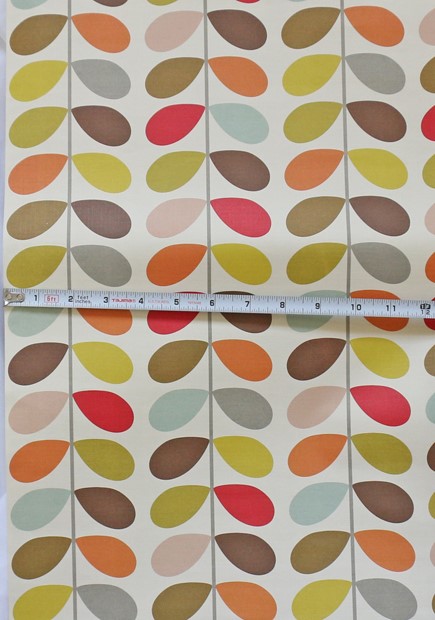

Step 3: Measure and cut the wallpaper accordingly, making sure to include the additional 2-inch margin. For example, for a bookcase that is 48 inches long and 36 inches wide, you will need your wallpaper to be 50 inches long. (Since most wallpaper rolls will not accommodate the width of a bookcase, you will likely need to use two pieces to cover the width.)
Step 4: Once you have your first piece of wallpaper cut to size, use a paintbrush to spread wallpaper glue onto the back of the wallpaper. Follow the manufacturer’s instructions for which adhesive works best with your paper.
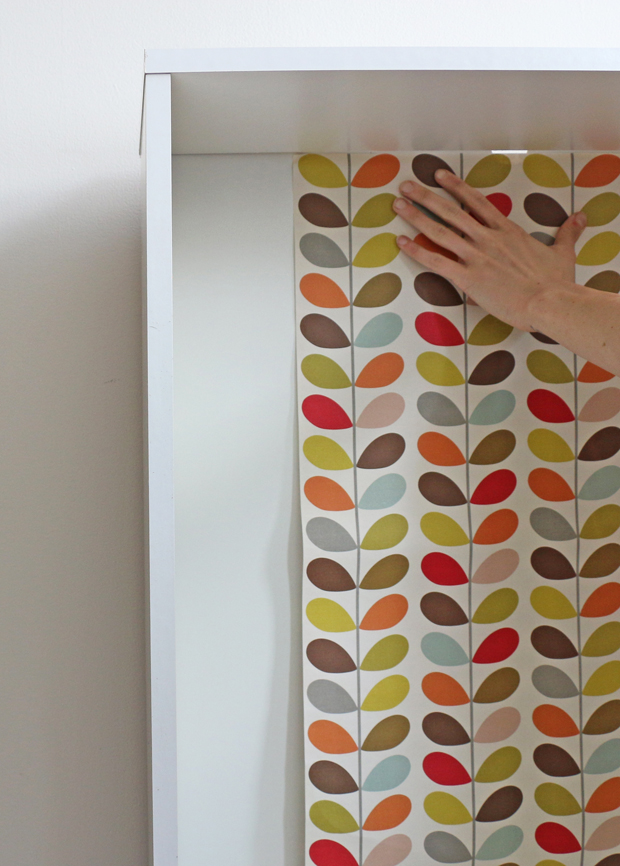

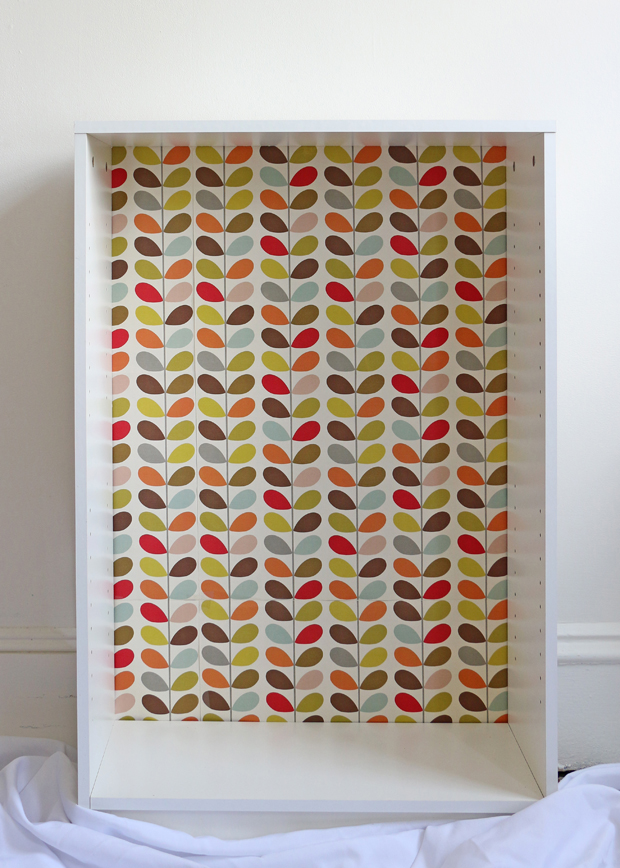
Step 5: Carefully apply the wallpaper to the back panel of your bookcase, beginning with an upper corner to ensure proper alignment. As you adhere your wallpaper piece, use the palm of your hand to smooth out the paper. If you see air bubbles, use the flat edge of a ruler to push the bubbles out of the wallpaper. Once the first piece of wallpaper has been added, use a ruler to find the bottom edge of the bookcase. Carefully cut along the bottom edge with a craft knife to cleanly trim off the excess wallpaper.
Step 6: Once you’ve glued the first piece of wallpaper to the bookcase, cut the second piece. Measure the remaining width needed, cut that exact width and use the same length measurement you used for the first piece. Before adding the glue, hold up the piece to the remaining blank spot to check two things: first, that the design matches up to the first piece; and second, that it perfectly fills the width of the space currently not wallpapered. Follow the same process you used for the first piece.
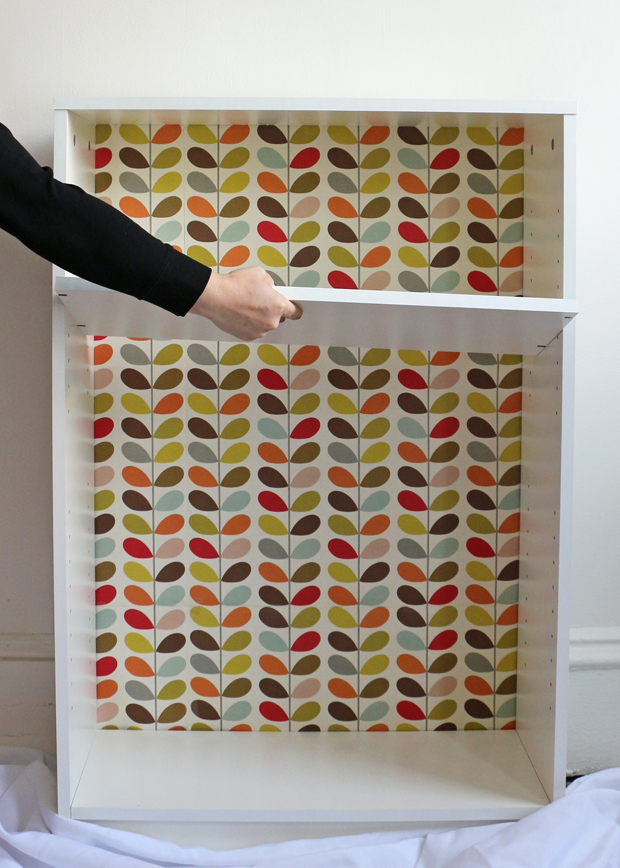
Step 7: Let the wallpaper dry, and then reattach the shelves and replace the items you had on the bookcase. Voila! A fun weekend project has produced a lovely place to showcase your treasures.