
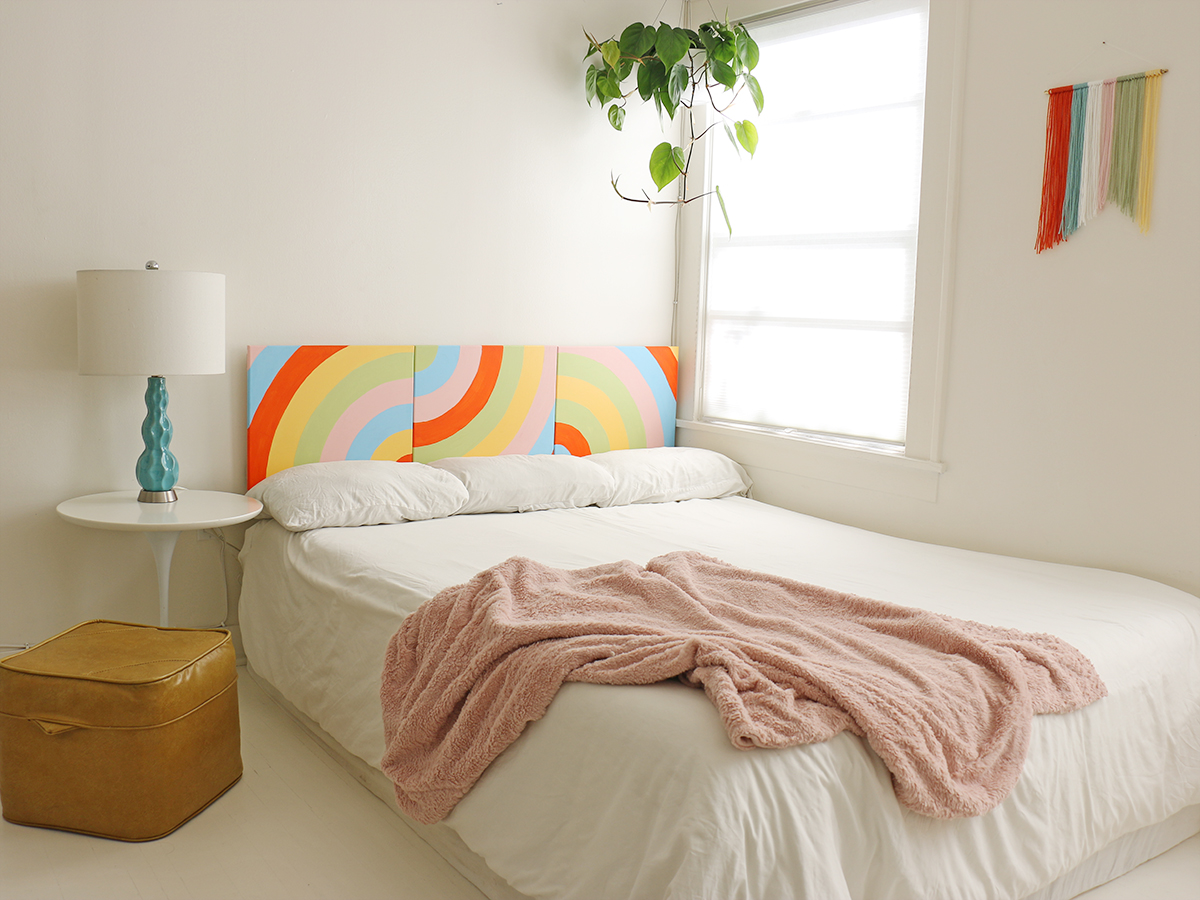

Your bedroom is your sanctuary, but it’s often the room that gets decorated last. If you never got around to it, or if you’re ready for a refresh, this is the series for you. We show you how to redecorate your bedroom, one affordable project at a time.
For the second installment in the series, we show you how to create a custom-painted headboard. By making it yourself, you can ensure the headboard fits perfectly in your bedroom — colors and all. And it will be completely original.
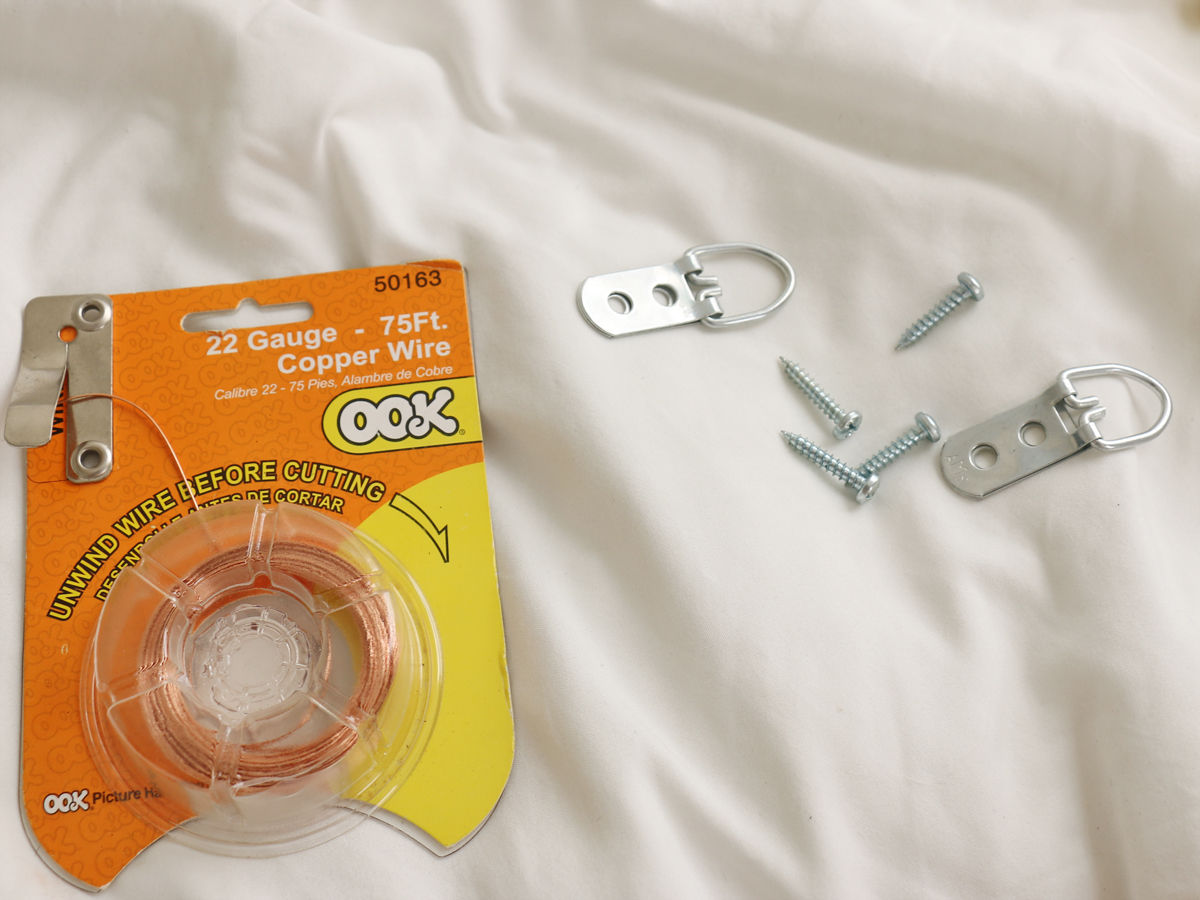
Materials Needed
- Measuring tape
- 3 stretched canvases (with a total length equal to the width of your bed)
- Pencil and ruler
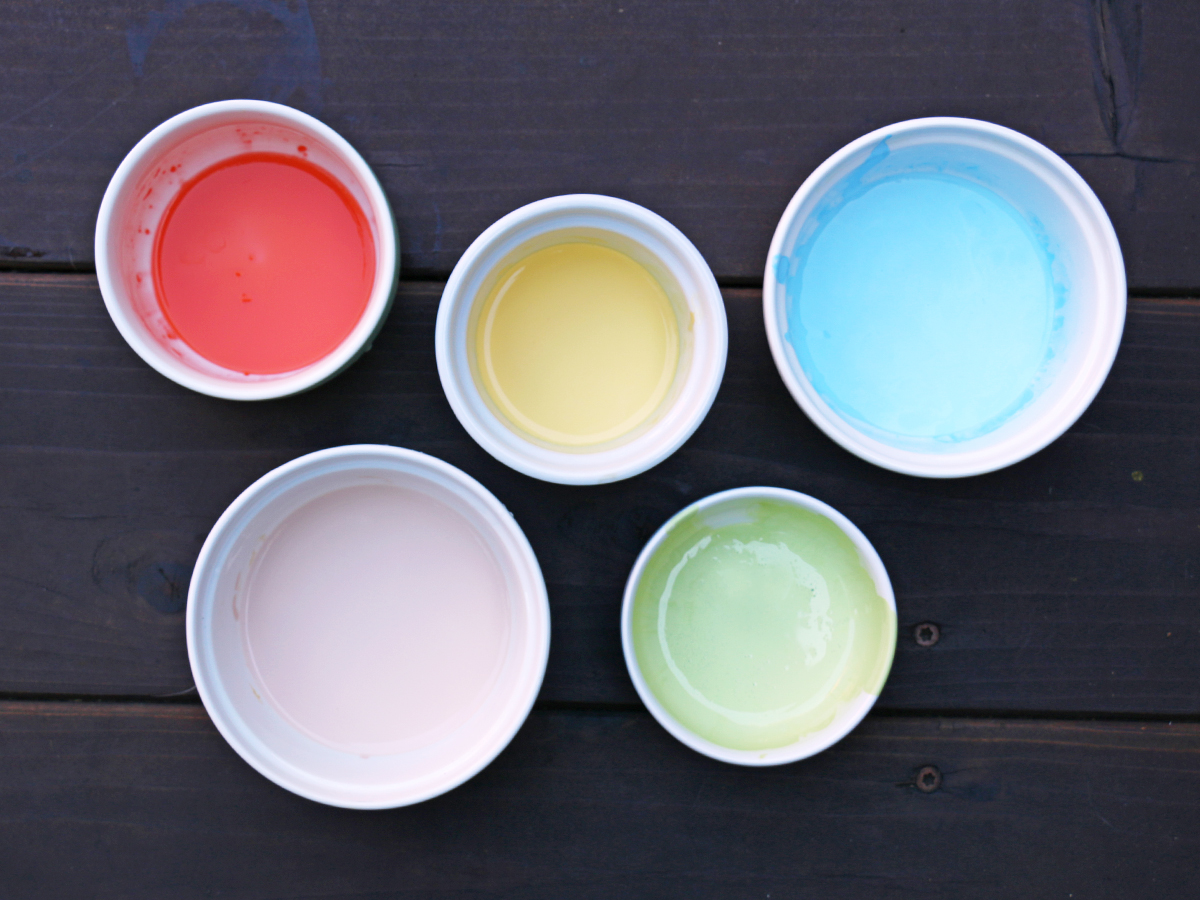
- Acrylic paint assortment, each color mixed with water and poured in a disposable bowl
- Paint brushes
- Framing lumber (fit to your preferred dimension, see step 4)
- Drill
- ⅞-inch screws
- Picture hanging wire
Step 1
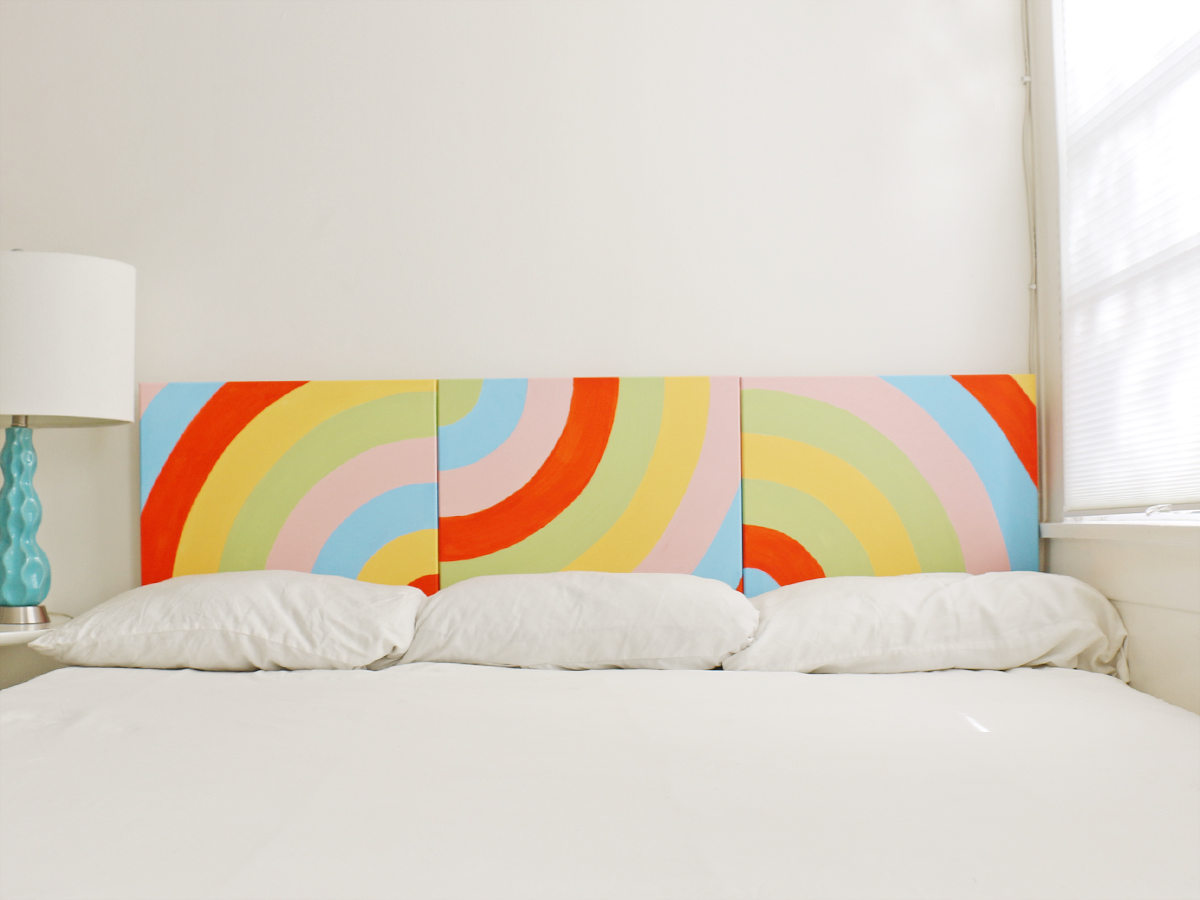
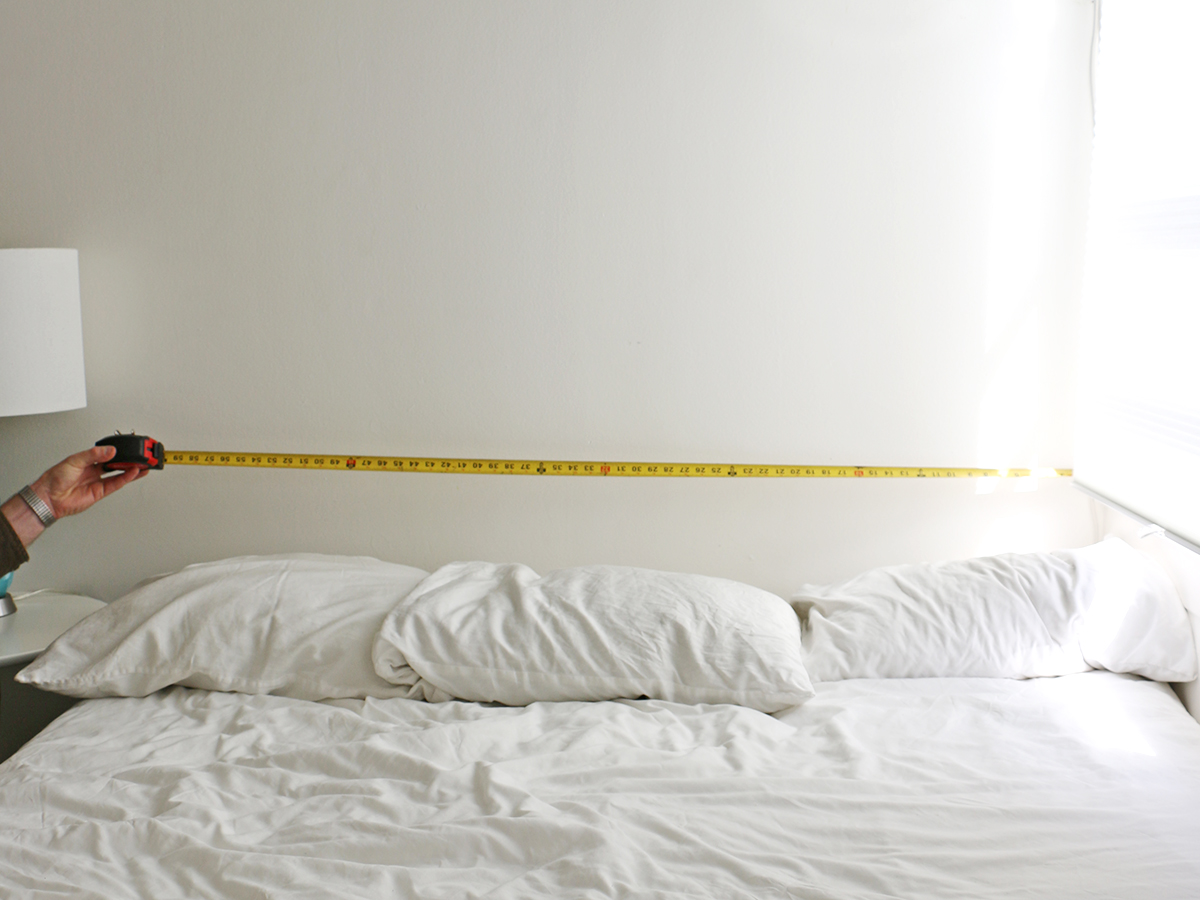
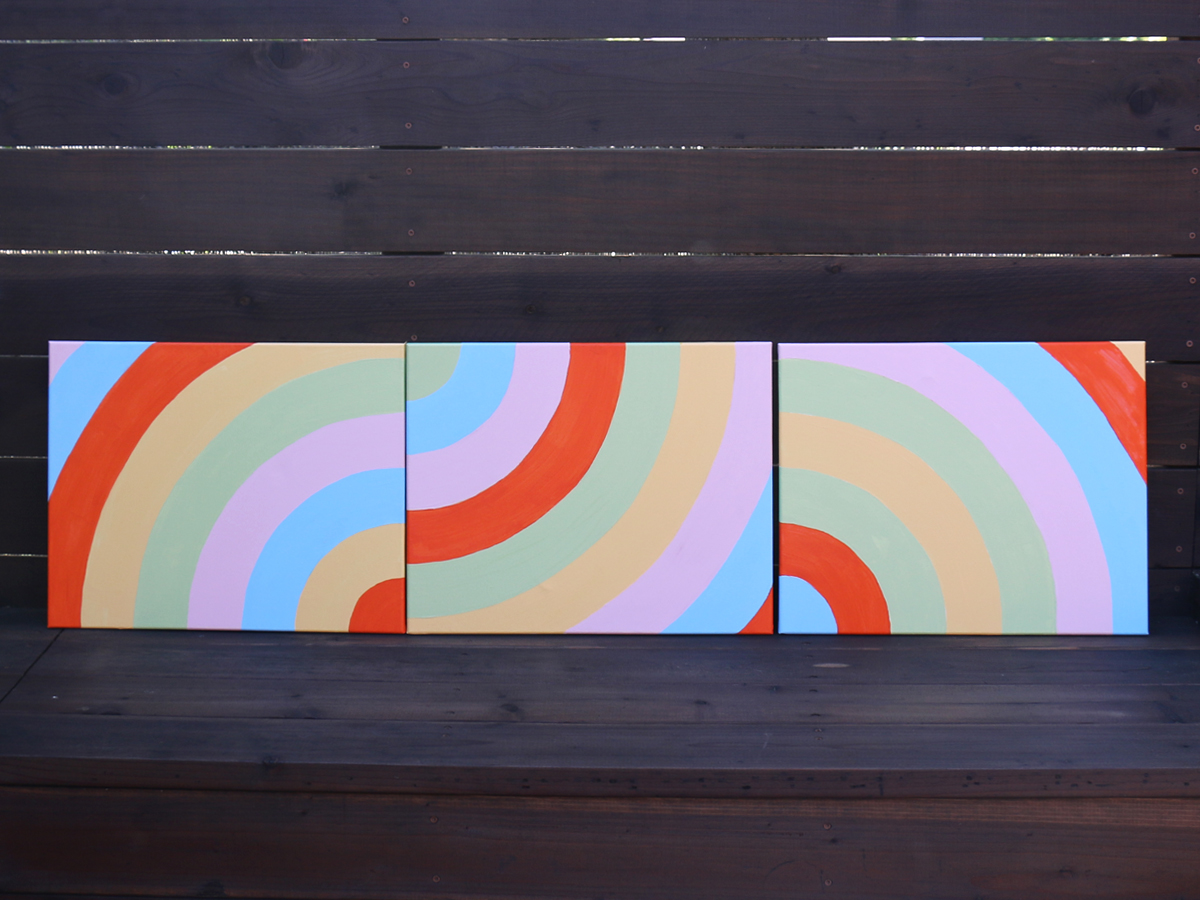
To begin, first measure the width of your bed and make sure the panels you plan to use are equal to that. We made a headboard for a queen bed, which is 60 inches wide, so we used three 20-inch-wide canvases.
Step 2
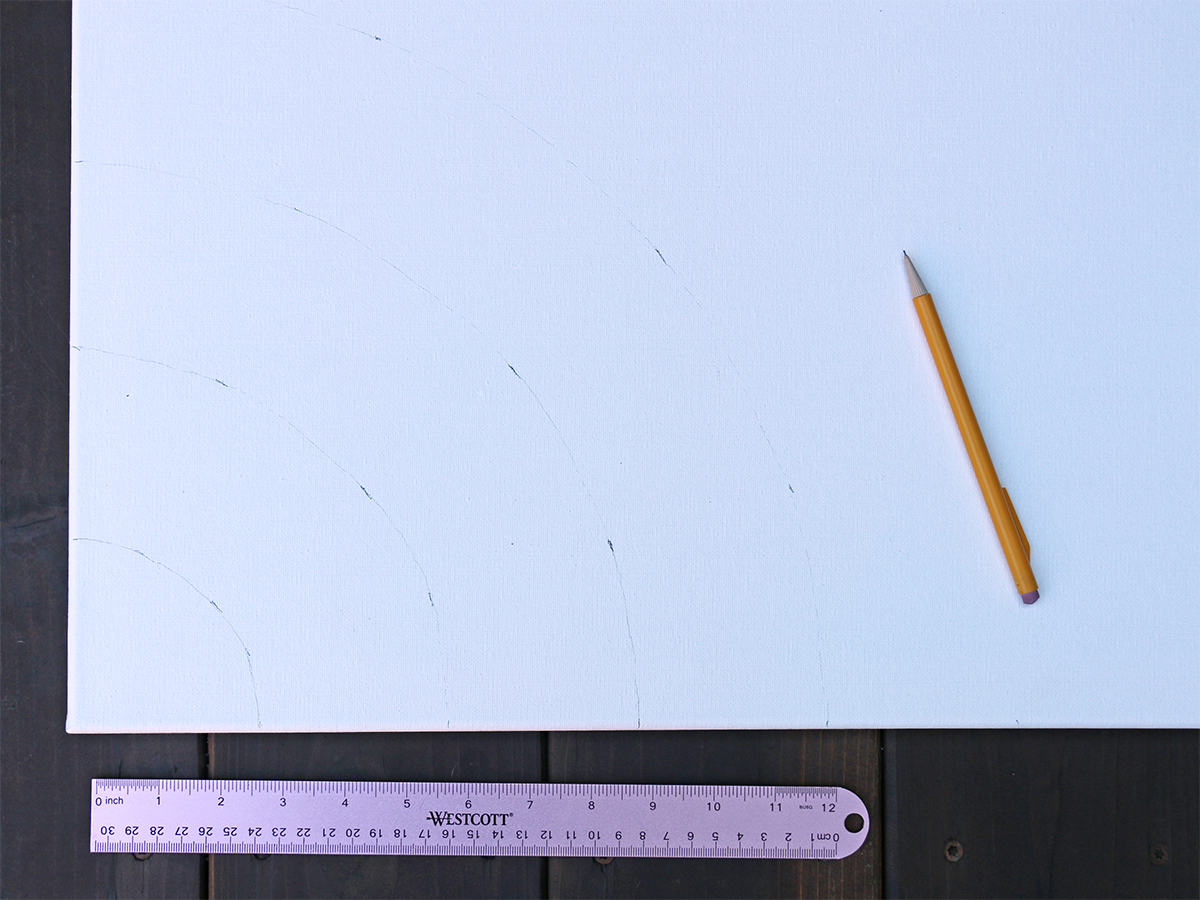
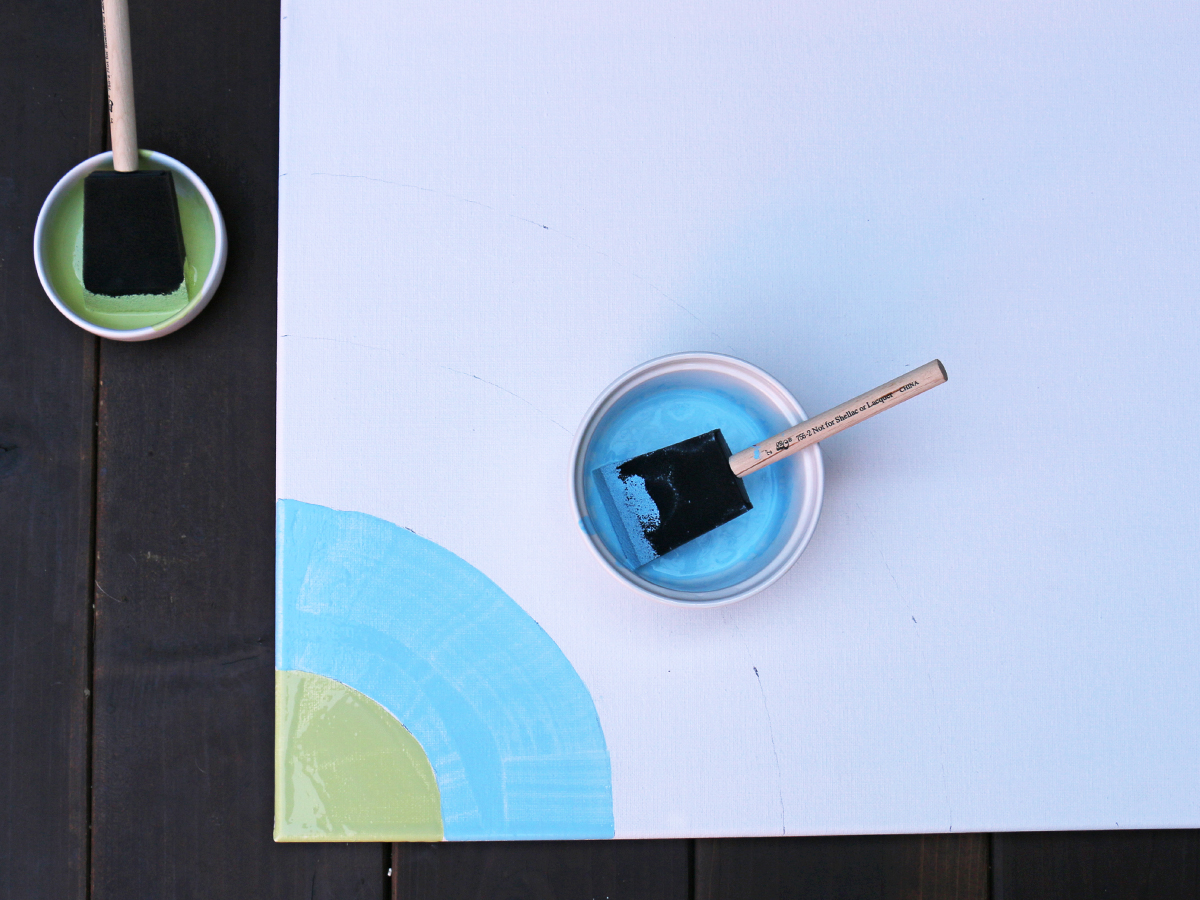
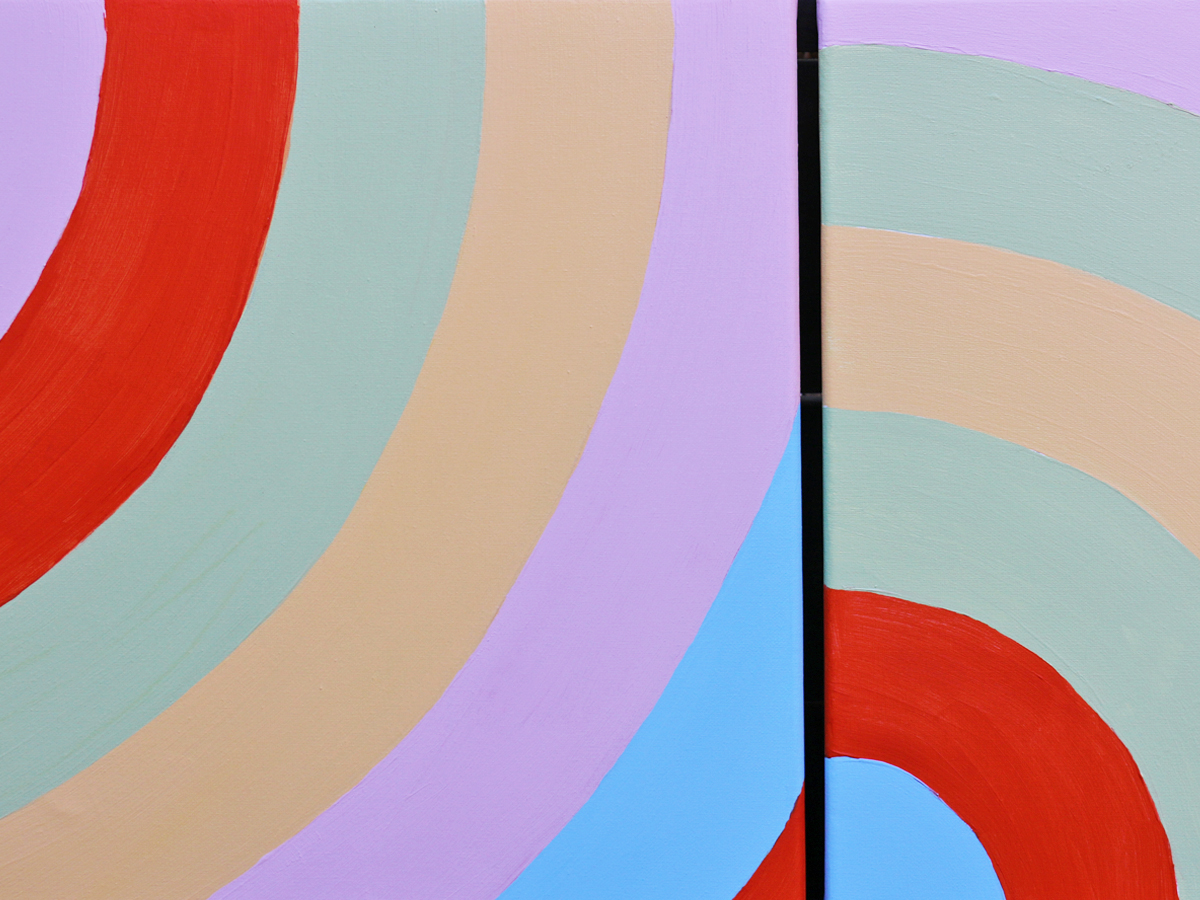
Once you have the right canvas sizes, plan your design for the headboard. We went with a conceptual, geometric design, which we repeated across each of the panels with a slight variation each time.
Once you’ve decided on a design, make light markings for it on each of the canvas panels using a pencil and a ruler (if needed).
Step 3
Next, mix each acrylic paint color you plan to use in a disposable bowl with a couple of drops of water. We chose colors that complemented the yarn wall hanging we created for the first project in this bedroom-decorating series.
Paint the design onto the canvas using a paint brush. When you’re finished painting the panels, set them aside to dry for at least two hours.
Step 4
While your panels are drying, make sure you’re set with the framing lumber. Because canvas panels are lightweight, you will not need heavy lumber for the supports.
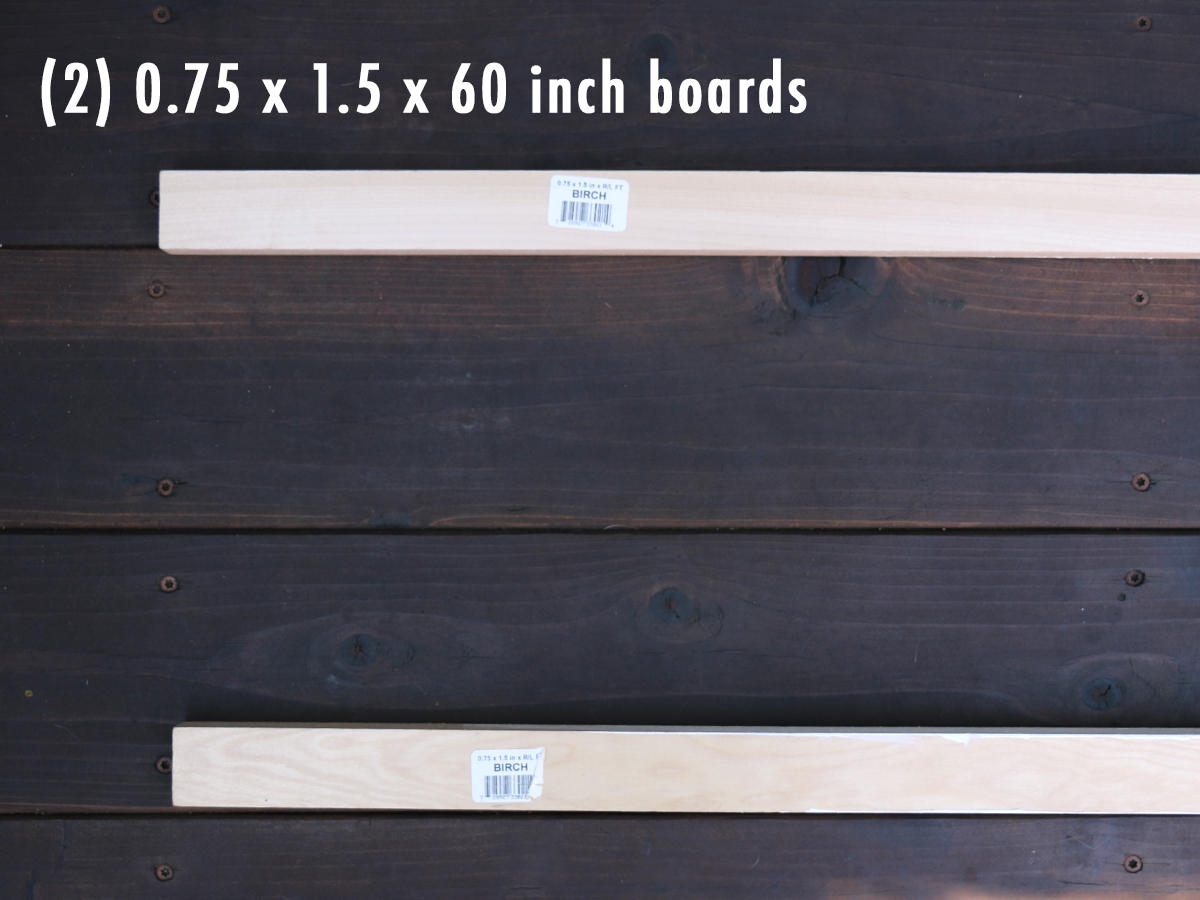
Unless you’re using larger or taller panels, two horizontal supports across the back of the panels will suffice. You want the support pieces to be equal to the total length of your panels (and the width of your bed). For our 60-inch, queen-size headboard, we bought two pieces of lumber that were .75 x 1.5 x 60 inches.

Step 5
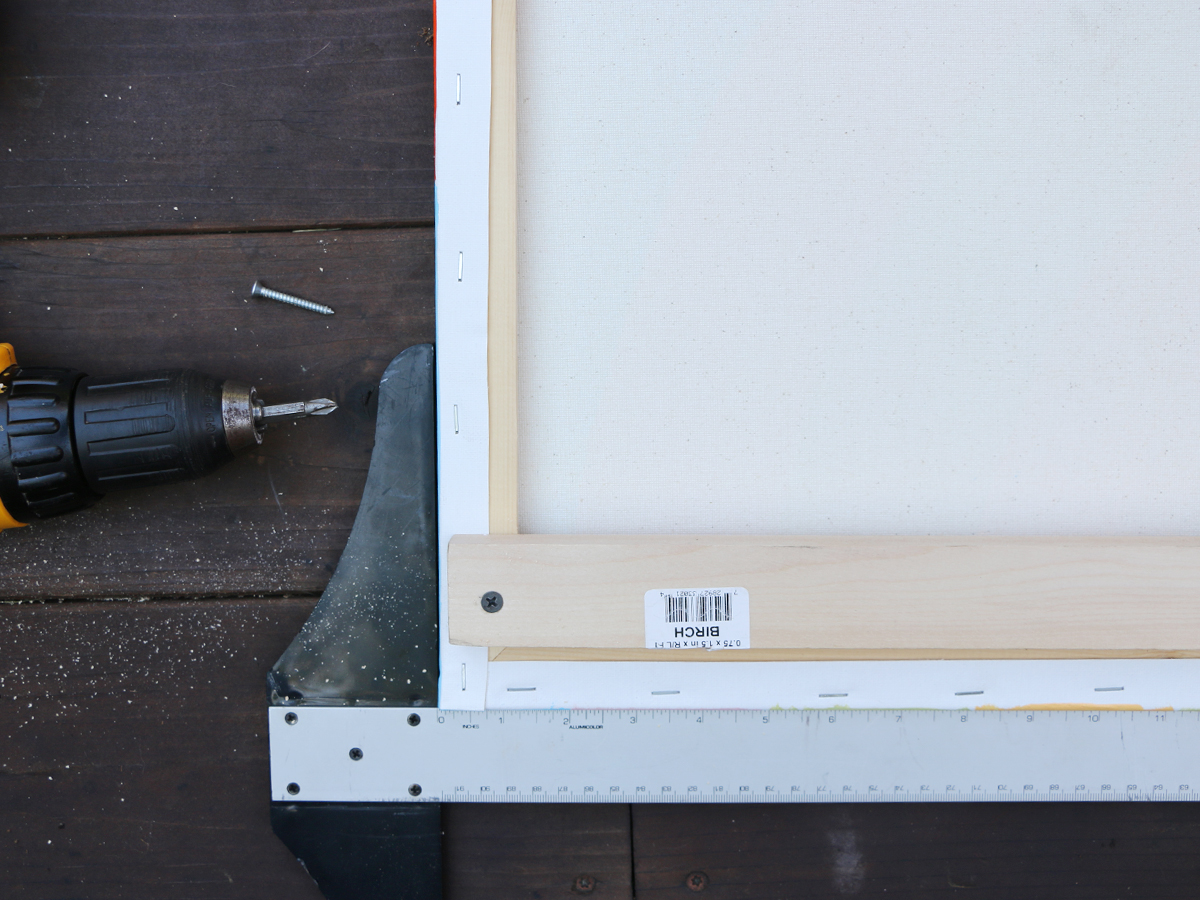
Once your canvas panels are completely dry, flip them over (keeping the desired design order) and use a ruler or straightedge to make sure they are level. Position your first support across the back of the panels. Center it toward the bottom of the frames, making sure that it doesn’t extend past the panel’s edge.
Use a drill and ⅞-inch screws to secure the support to the back of the panels. Add one screw at the bottom of each panel where the panel crosses the canvas frame (six screws per support).
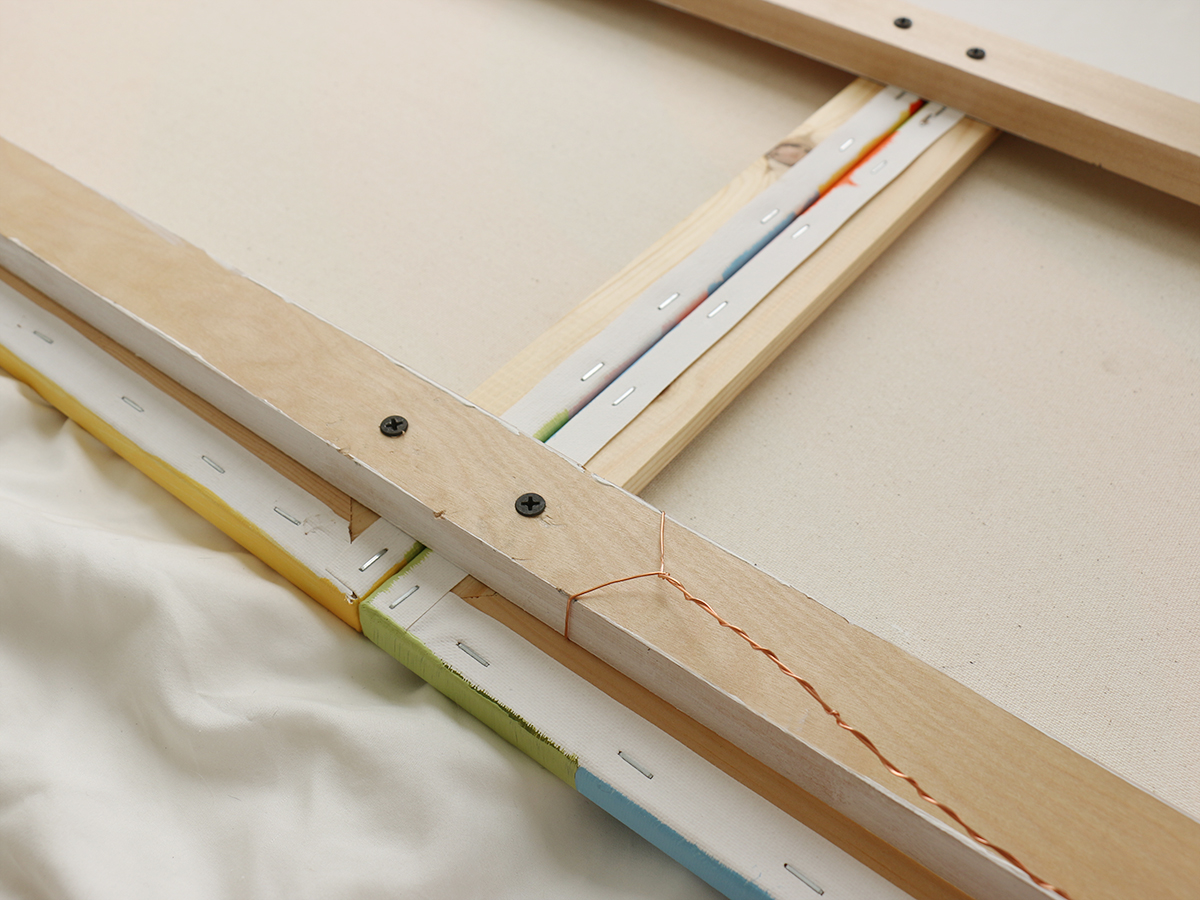
When finished, add the second support toward the top of the panels, and repeat the drilling process.
Step 6
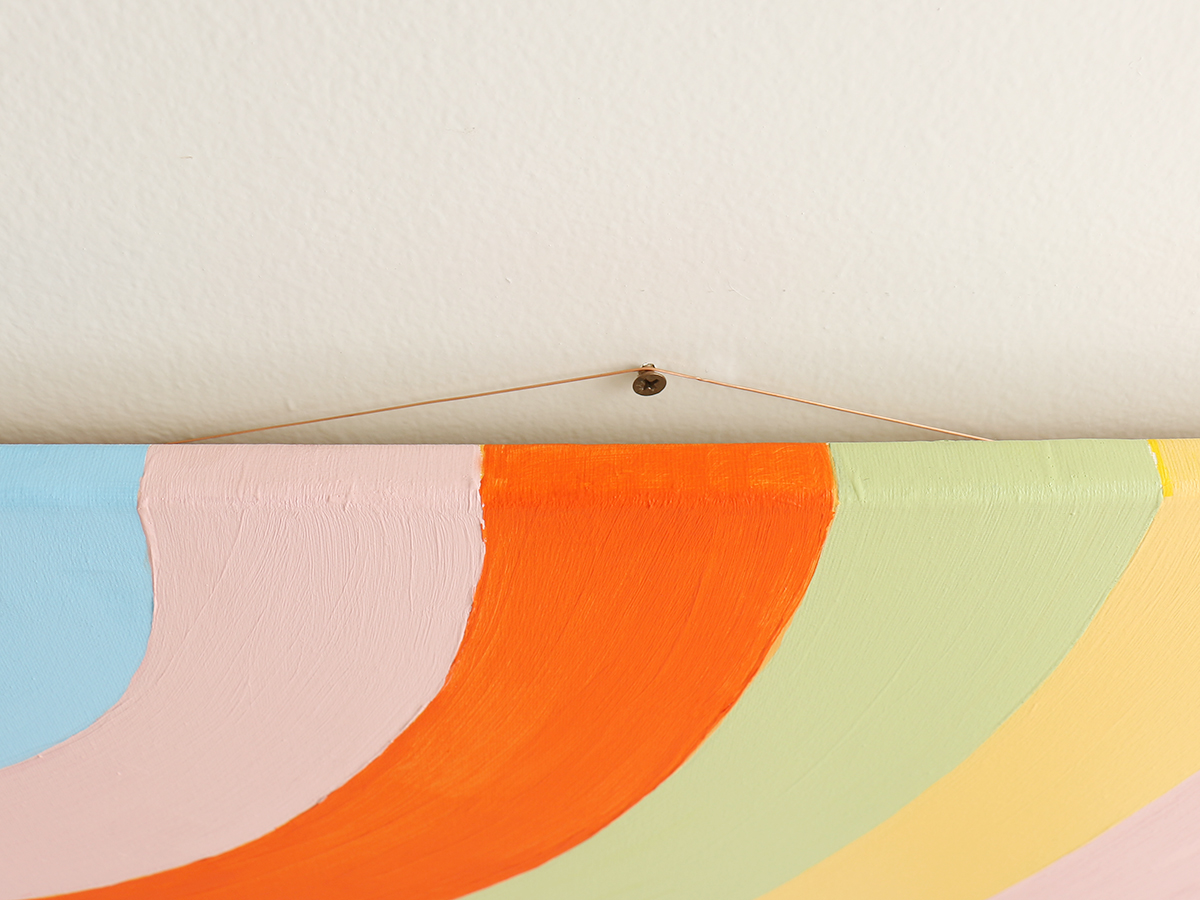
Now it’s time to add the hanging wire. Wrap strong picture wire tightly around the center of the top support. Figure out where it will need to hang to be centered on your bed, and add a screw to the wall at that position. Now you’re ready to hang your headboard!
If you want additional reinforcement, center three strands of wire on the support, in the middle of each panel. You’ll also need to use three screws in the wall, all level on the hanging plane to hold each wire.
Alternatively, you can also use picture-hanging hooks with the wire. Just screw the hooks into the top support before adding on the wire.