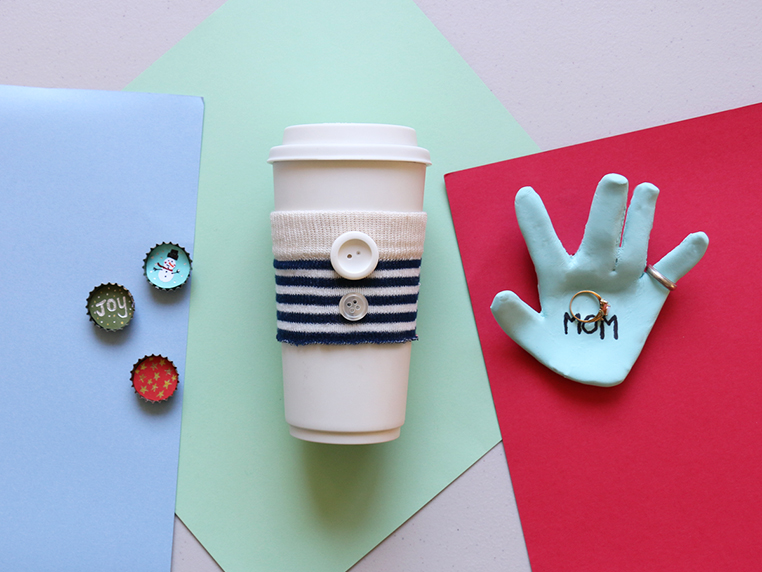
With a little determination and creativity, you and your kids can whip up various holiday crafts to give as budget-friendly gifts this season. From coffee koozies to hand-shaped ring dishes, there are plenty of DIY holiday crafts for kids to try. Get into the gift-giving spirit with these cute ideas.
Bottle Cap Magnets
Recycle bottle caps into adorable refrigerator art! Kids can fill the bottle caps with holiday artwork or seasonal gift wrap to make festive magnets that make for great handmade holiday gifts.
What you will need:
- Bottle caps
- Paper (construction paper and/or gift wrap scraps)
- Markers or pens
- 1-inch circle punch
- White glue
- Adhesive magnets
Step 1
Use a 1-inch circle hole punch to cut out pieces of construction paper and gift wrap scraps to line the inside of the bottle caps.
Step 2
Help your kids doodle small holiday designs or personalized notes onto the paper with markers or pens.
Step 3
Apply a dab of glue to the back of the paper, and stick to the inside of the bottle cap.
Step 4
Stick or glue a magnet to the back of each bottle cap. Set the bottle caps aside to dry for a few hours before use.
Cozy Coffee Koozies
Using unwanted or misplaced socks, kids can create reusable coffee koozies that are perfect gifts to help keep warm drinks hot during chilly winter months.
What you will need:
- Old socks
- Fabric scissors
- Miscellaneous embellishments (old buttons, felt, stickers, gems, etc.)
- Fabric glue
Step 1
To make the reusable coffee sleeve, cut 4 inches from the top of the sock.
Step 2
Add embellishments using fabric glue.
Step 3
Let dry before use.
Hand-Shaped Ring Dish
With air-dry clay, kids can turn their handprints into an adorable ring dish for Mom or a cool loose change collector for Dad.
What you will need:
- Air-dry clay
- Rolling pin
- Toothpick
- Knife
- Small ball
- Pencil
- Permanent marker
Step 1
Roll out the air-dry clay onto a non-stick surface. Allow children to position their hand in the center of the clay, and trace around it with a toothpick.
Step 2
Adults only: Once the hand has been traced, use a knife to cut out the handprint from the clay. Smooth any rough edges using your finger.
Step 3
Use a bit of spare clay to form a support for the ball, and then position the clay hand upside down on top of the ball, using your fingers to gently shape the hand to form a dish shape. Allow the clay to dry (approximately 8 hours, or per package instructions).
Step 4
Once dry, gently remove the hand from the ball and allow the top side to dry for a few additional hours. After both sides of the hand have fully dried, allow the kids to personalize their handprint dish with a permanent marker.
Tip: If you’re working with small children, let them use a pencil to decorate. Once they’re happy with their work, re-trace with a permanent marker and then erase the pencil marks.
Looking to do a little more than DIY this holiday season? Get instantly approved for up to $3,000 worth of merchandise on the computers, gaming systems, designer handbags, furniture sets, and other items on your holiday wish list. You can even get free delivery as late as Christmas Eve. Shop online today or visit your nearest Rent-A-Center for a worry-free holiday!
