
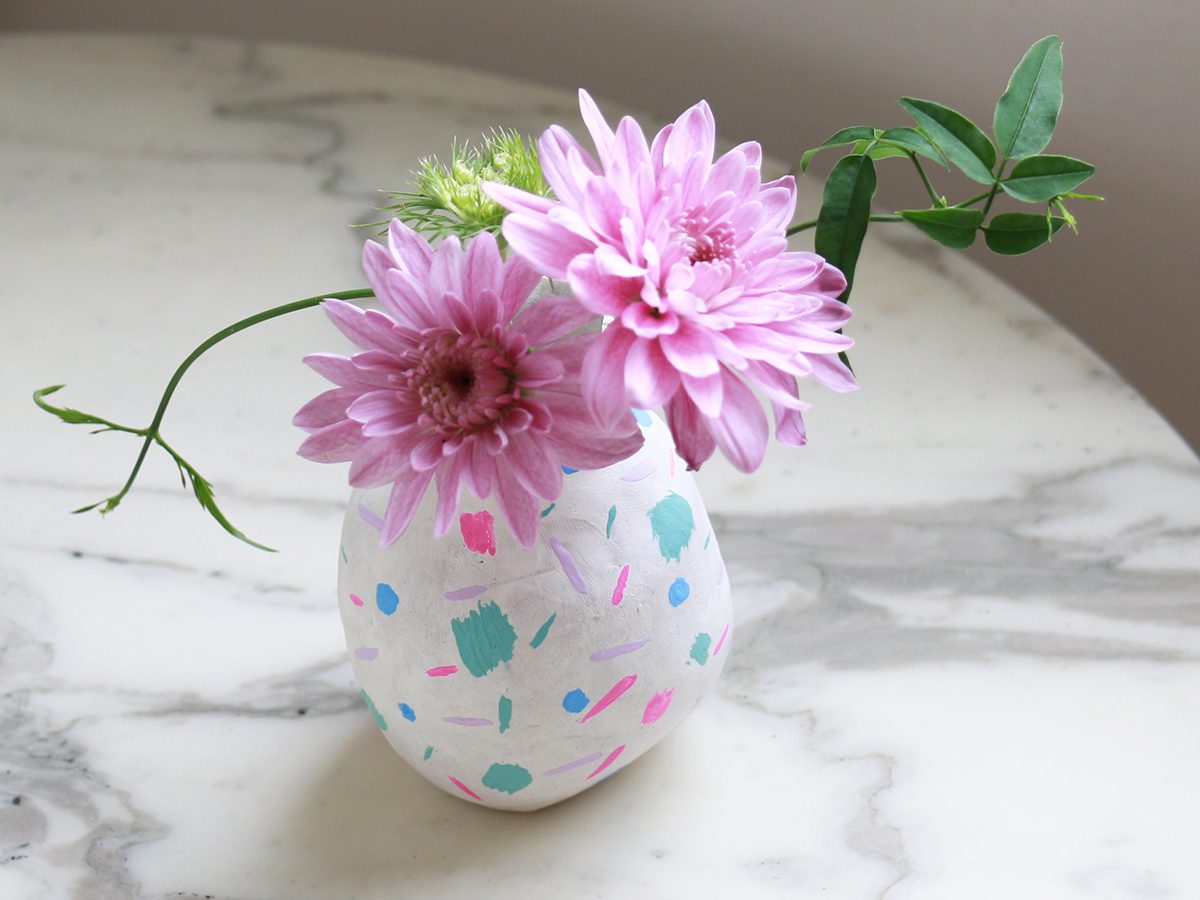

Mother’s Day is fast approaching, and we have just the DIY gift to make Mom’s day: a handmade, personalized vase. With air-dry clay and the basic pinch-pot method, it’s easy to make. After you’re done, just fill with flowers, and you’re good to go. We don’t know what’s better — the thoughtfulness of the gift, or the joy it will bring Mom.
Materials
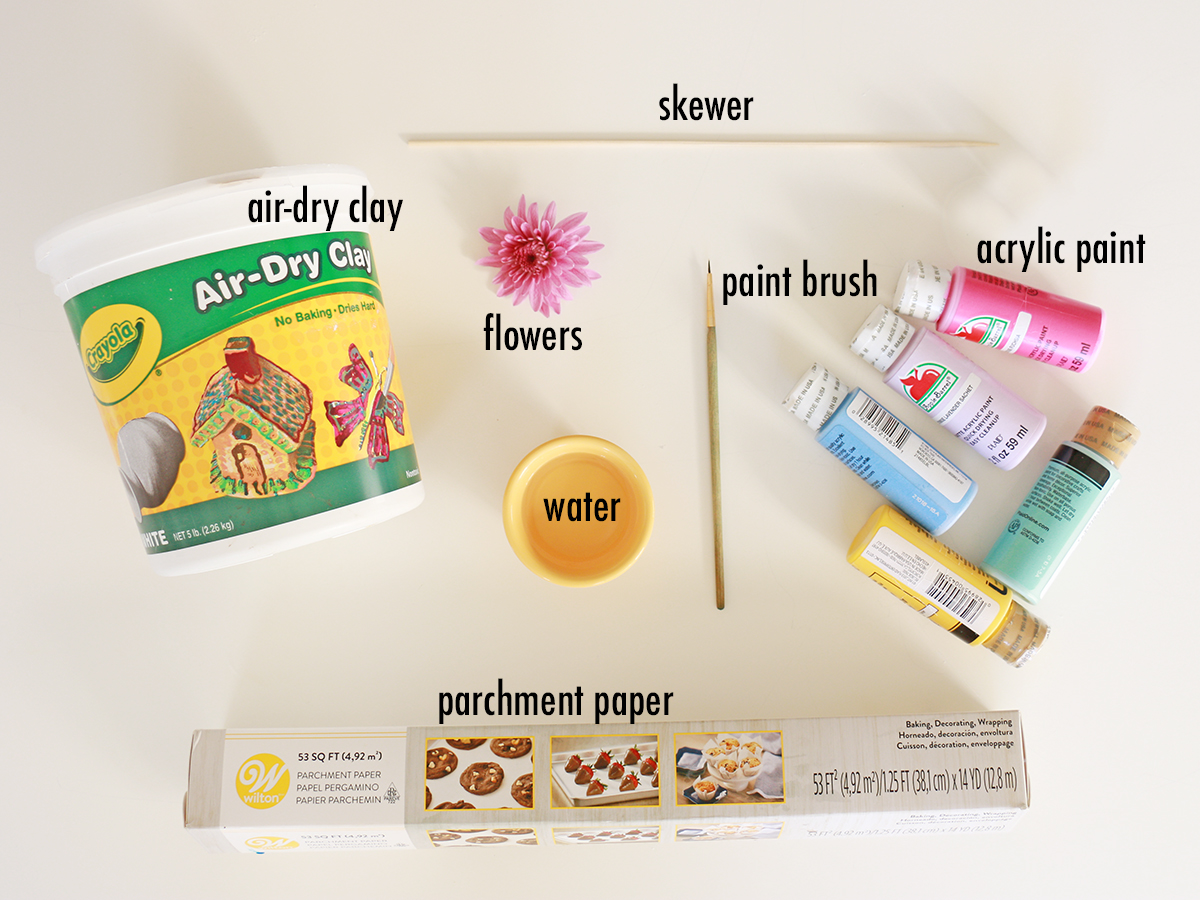
- Air-dry clay
- Parchment paper
- Acrylic paint
- Paint brush
- Water
- Skewer (or any similar tool)
- Optional: Flowers
Note: When working with clay, use a sheet of parchment paper or another nonstick surface.
Step 1
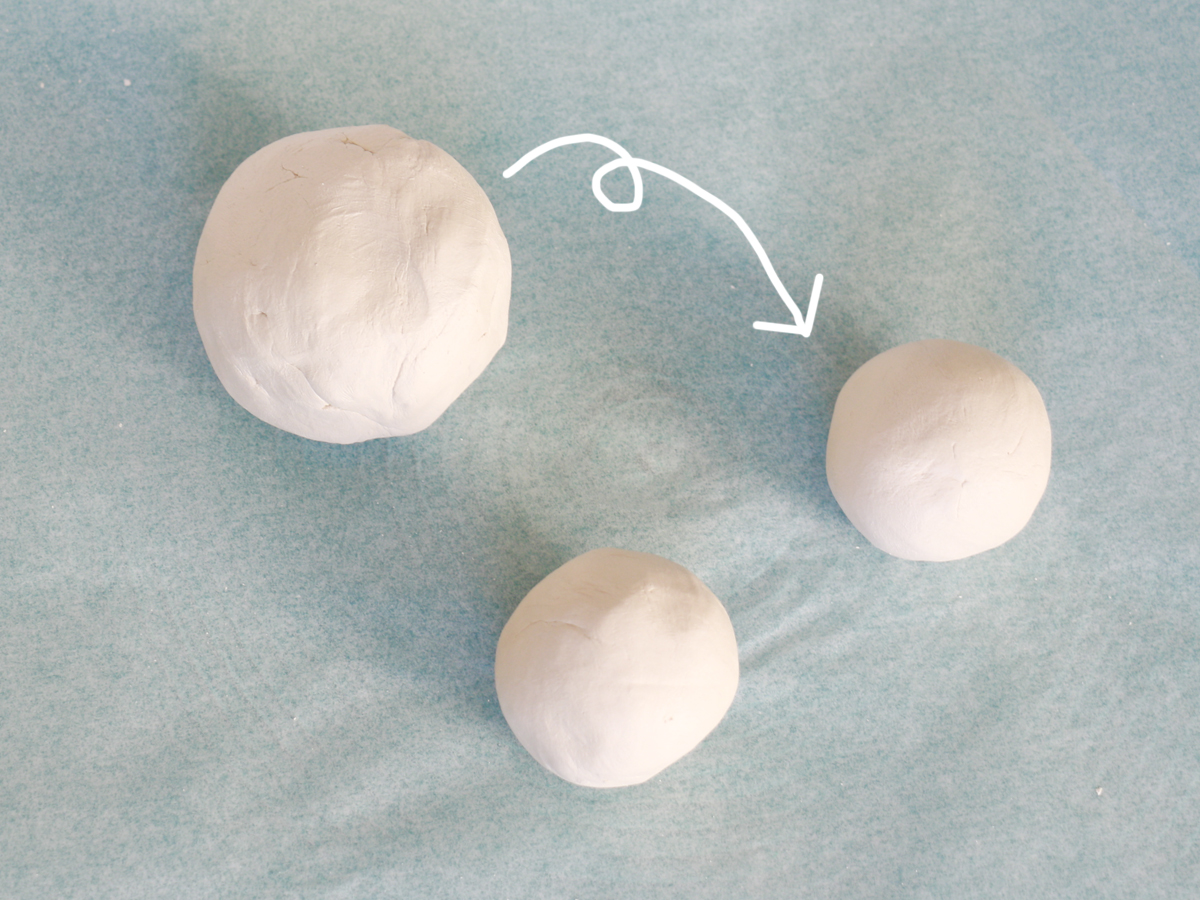
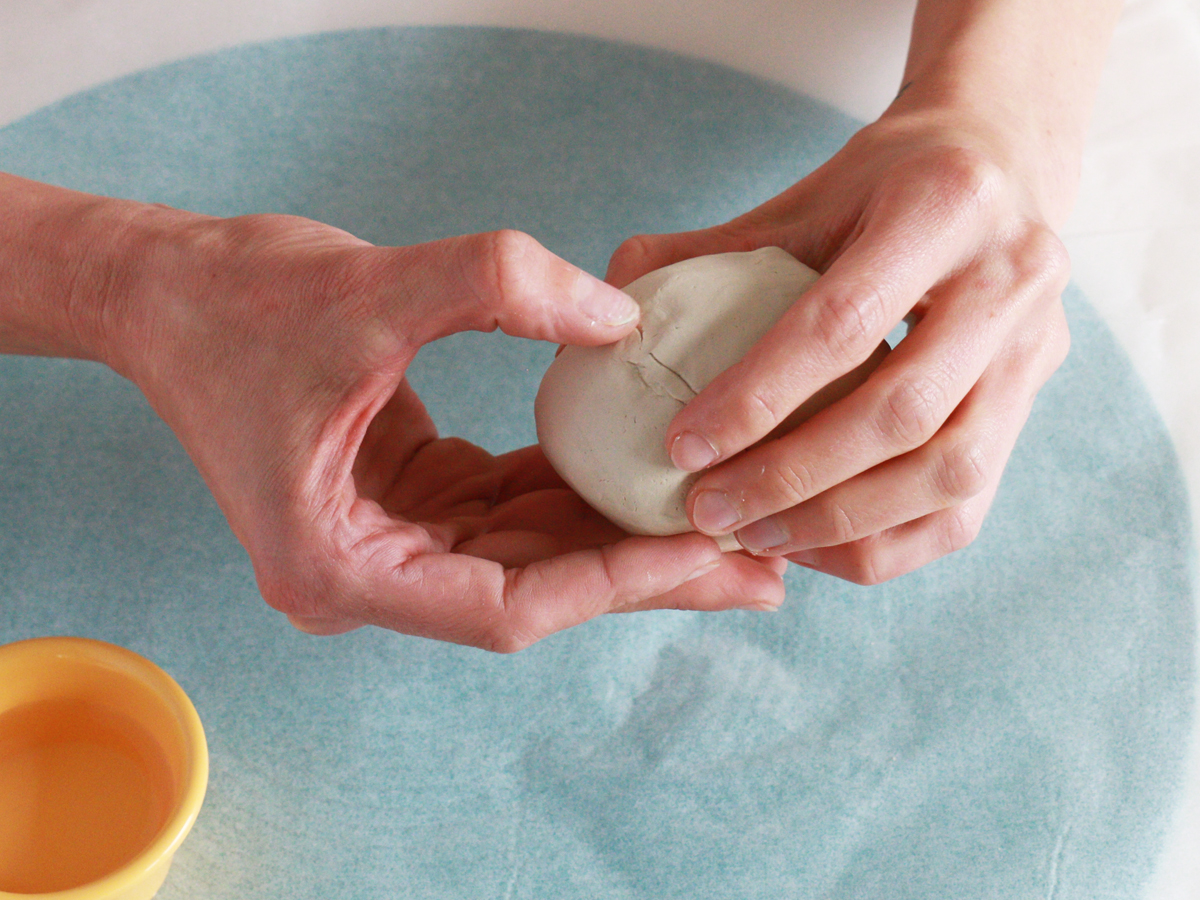
Knead a handful of air-dry clay into a round ball, roughly the size of a tennis ball. Then divide the clay into two and roll each half into a ball. If the clay feels too soft and isn’t keeping its round shape, let it sit out for a few minutes before moving on.
Step 2
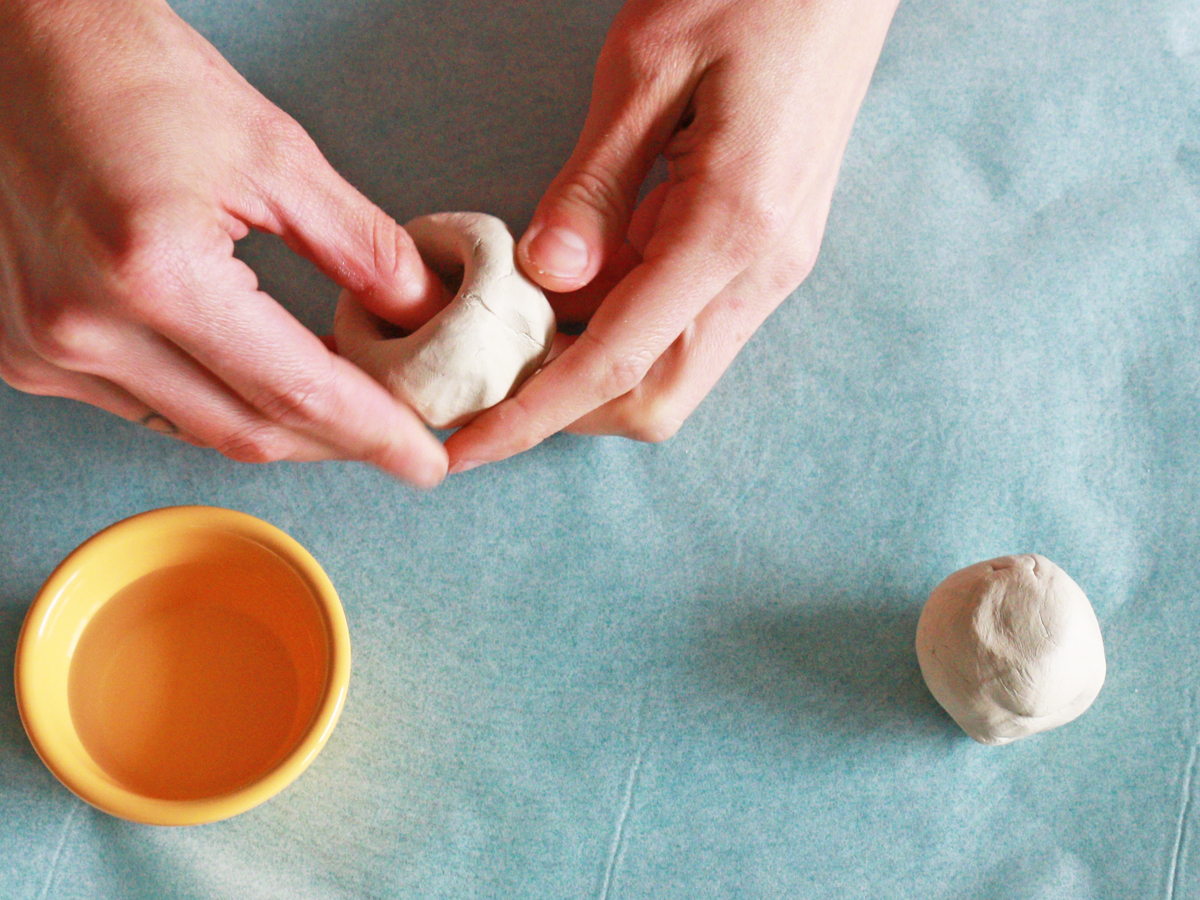
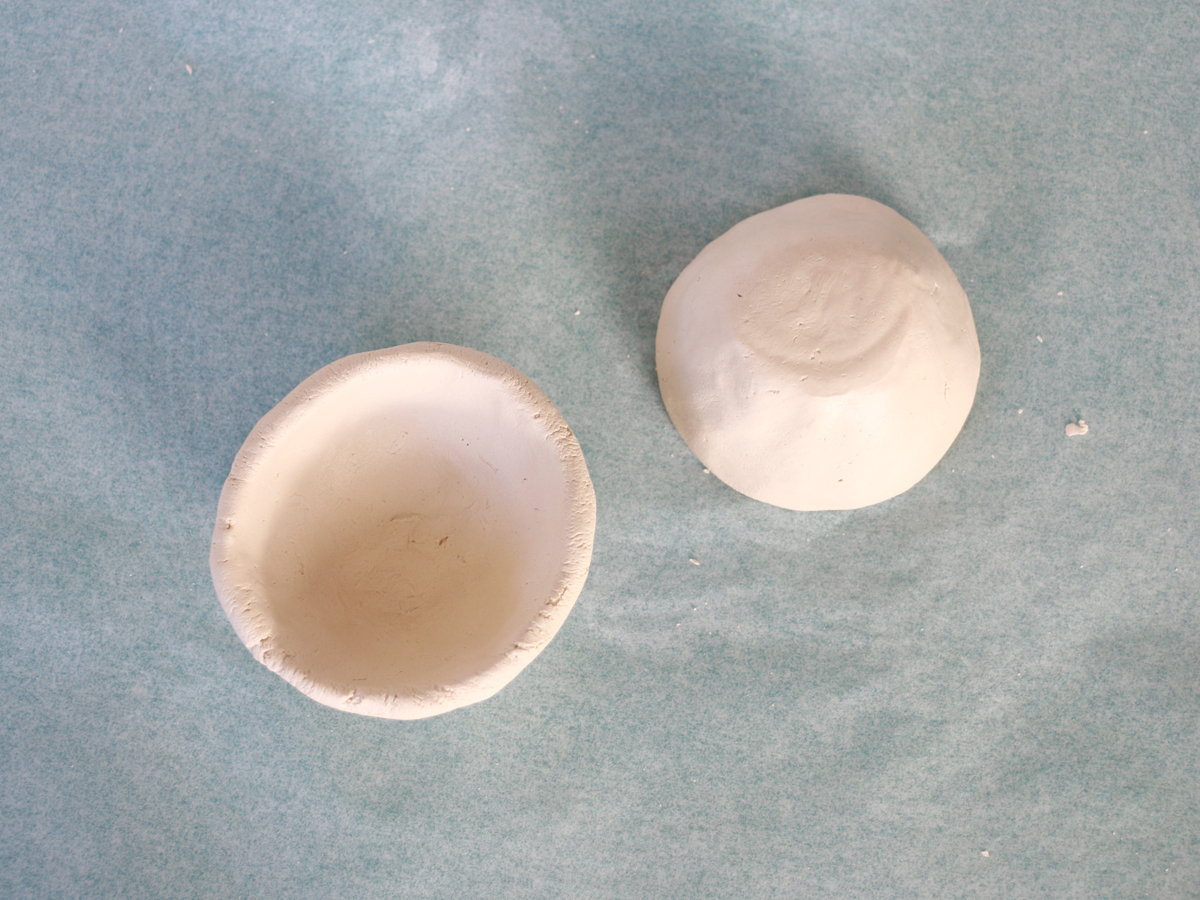
To make the vase, you’ll create two half-sphere-shaped bowls and join them together. Take the first ball of clay and push your thumb into the center, then lightly pinch the clay between your finger and thumb to shape it into a bowl. Once shaped, set it upside down; the air beneath it helps the bowl keep its shape and creates a flat and level rim.
Step 3
Repeat step 2 with the second ball of clay, working until you’ve achieved a bowl with an equal diameter as the first. Let the two molded bowls sit upside down for a few minutes to firm up.

Step 4
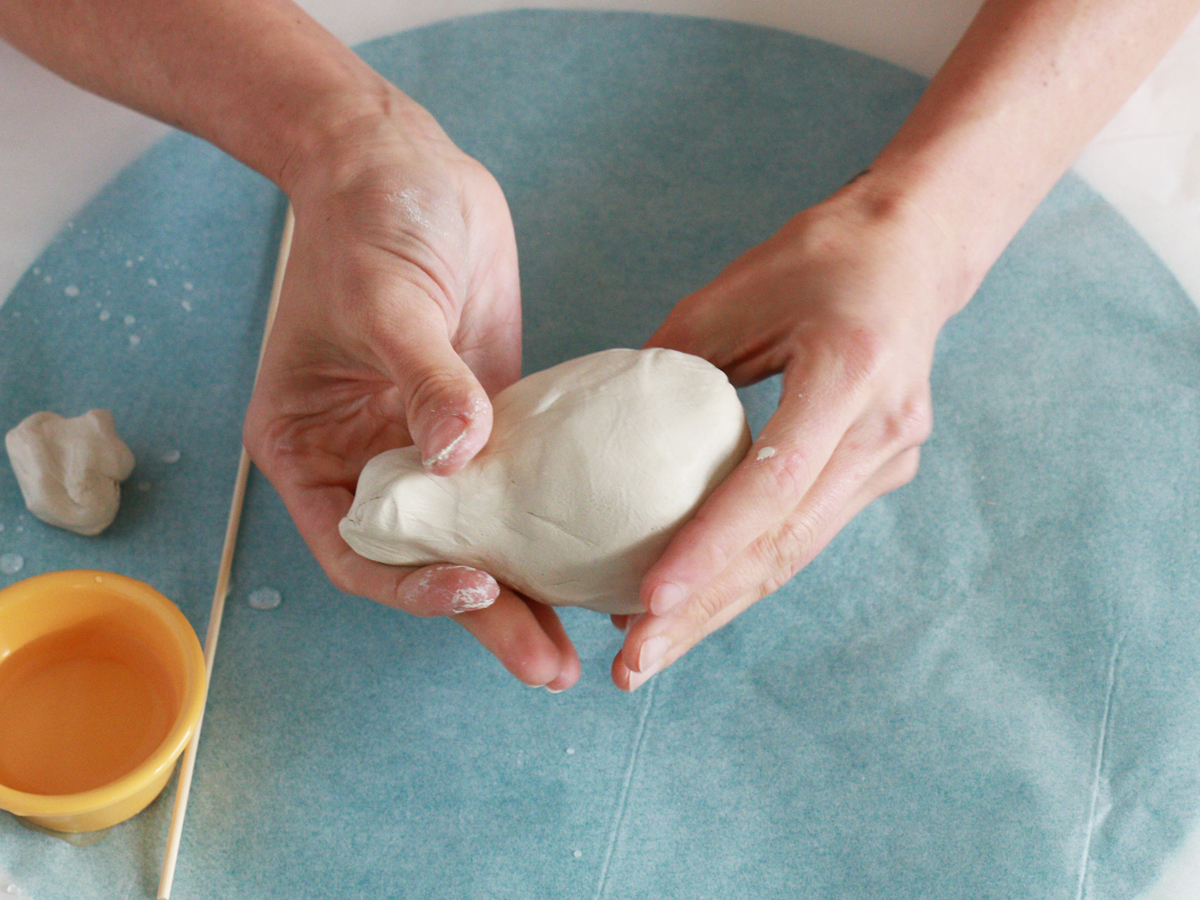
Join the two spheres together. Gently work the edges together to trap the air inside the clay. (The air will support the shape of the vase.) Blend the edges into the body of the pot by gently smoothing the crease with your fingers until they have combined. This will take some time, so be patient!
Step 5
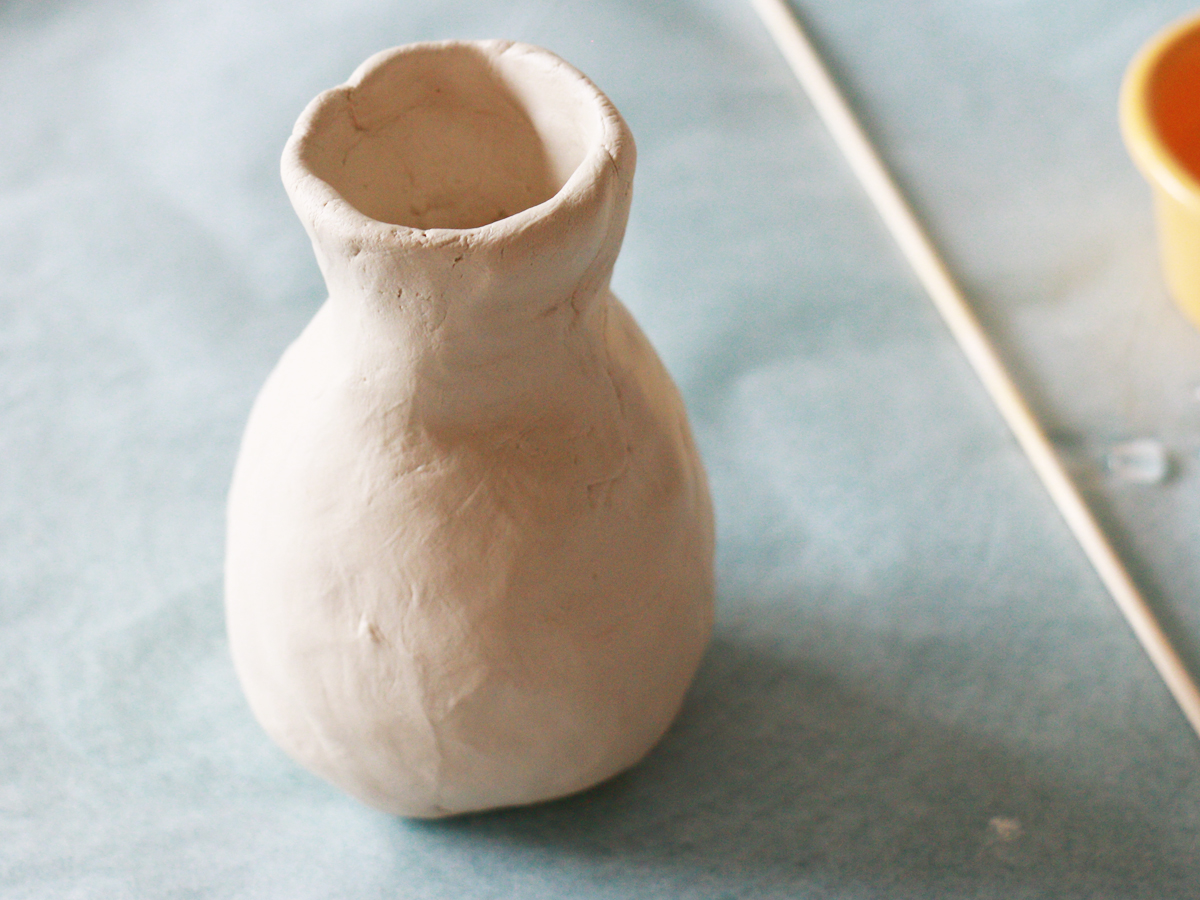
Shape your ball-shaped vase into a slight pear shape by gently molding and rolling it. If the vase isn’t holding its shape, set it aside for a bit. If you get a small tear, just pinch and smooth that area of the vase.
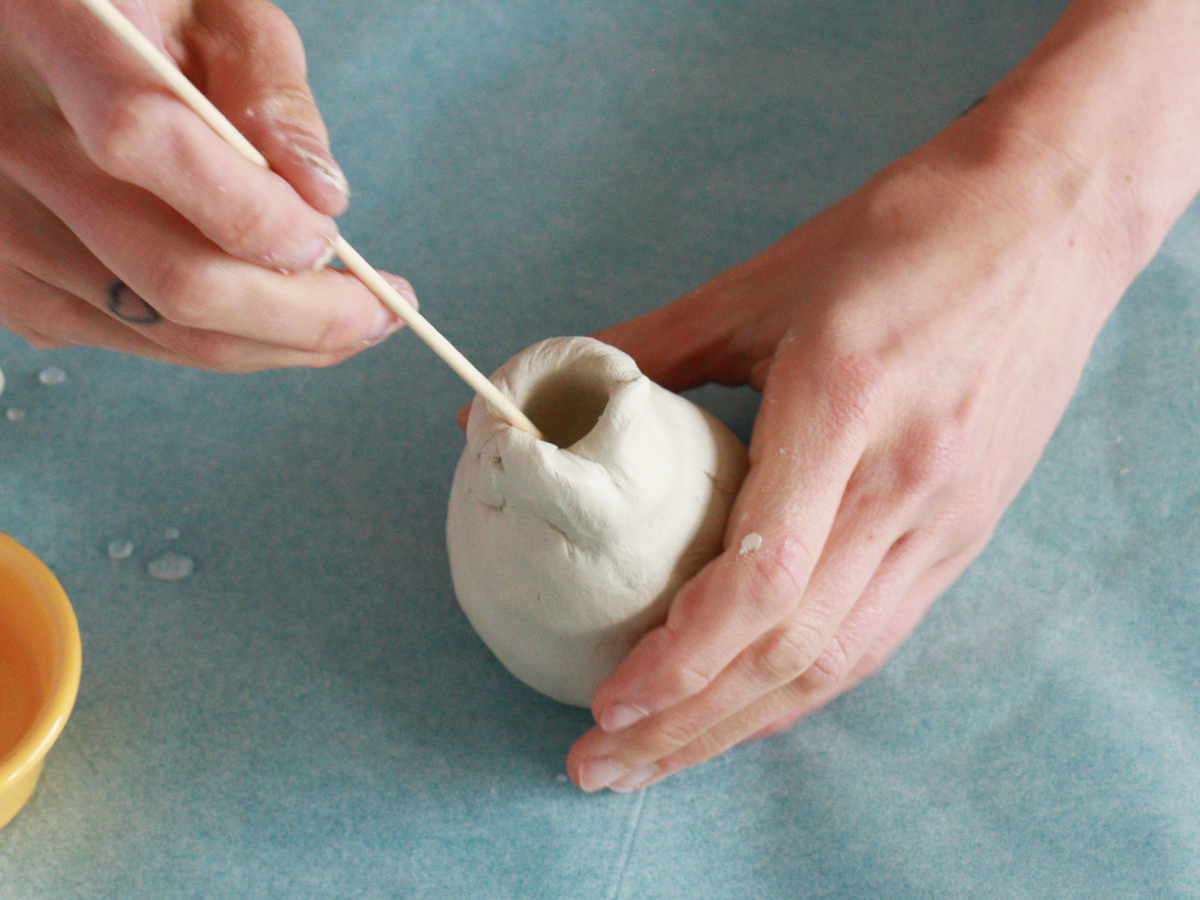
Work up the top of the vase to create the lip. Once shaped, slowly open the top by inserting a skewer and then your finger into the center. Use your fingers to shape the lip of the vase. If needed, very lightly wet your fingers to help you achieve any intricate details at the top.
Once you’ve finished shaping your vase, let it sit out to dry. Depending on how thick your vase is, dry time is typically one to two days. If you’re using white air-dry clay, you’ll notice the vase will become whiter as it dries.
Step 6
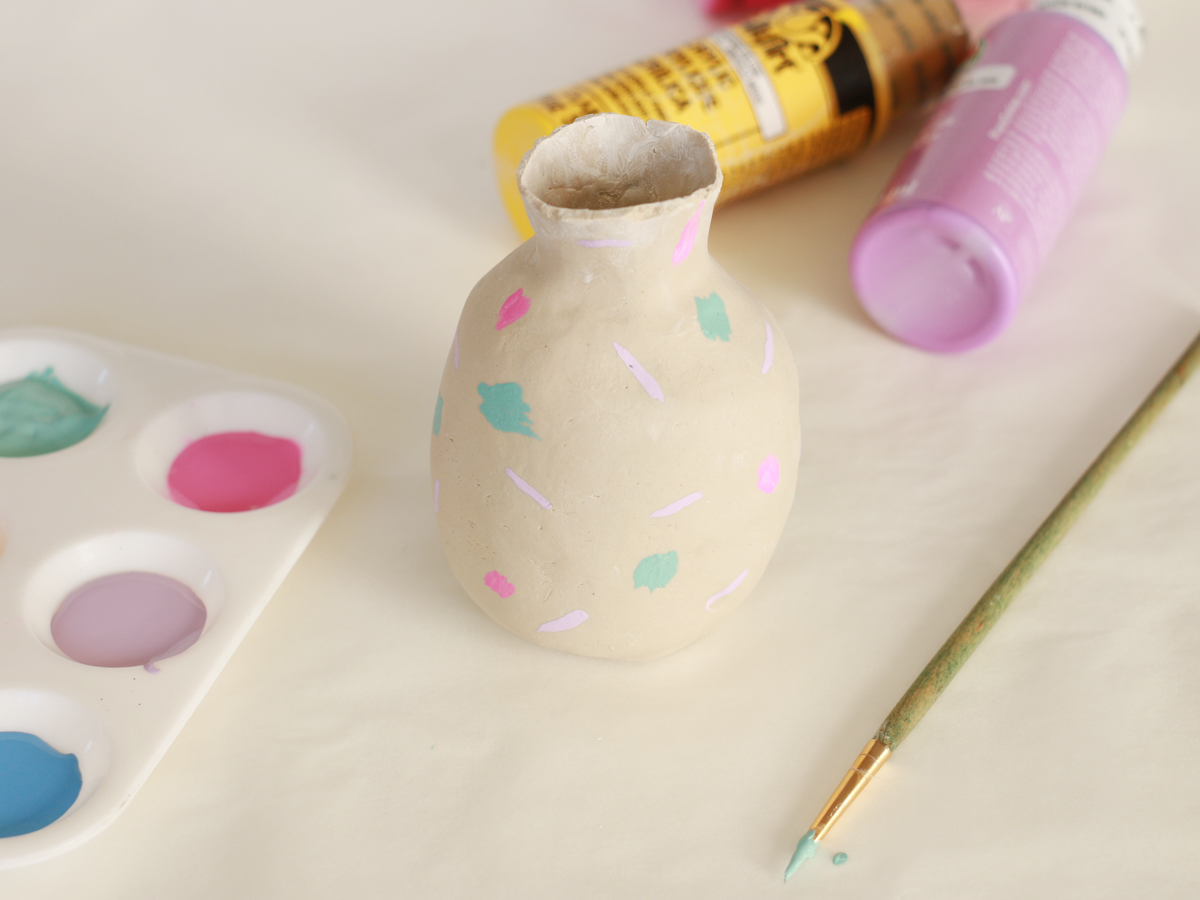
After the vase has dried for 24 hours, you can paint it using acrylic paint, in any design you wish. Once the vase is fully dry, add in flowers, and your DIY Mother’s Day gift is ready.