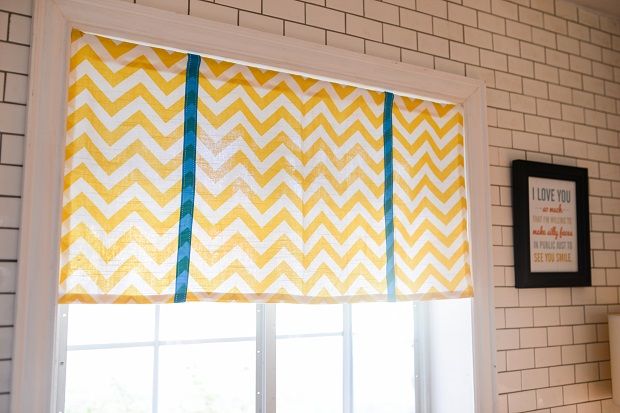
Love the look of a bright, cheery window treatment but not handy with a needle and thread? Let us show you how to whip up a cute valance in less than a half hour. This little project is perfect for hiding raised blinds during the day.
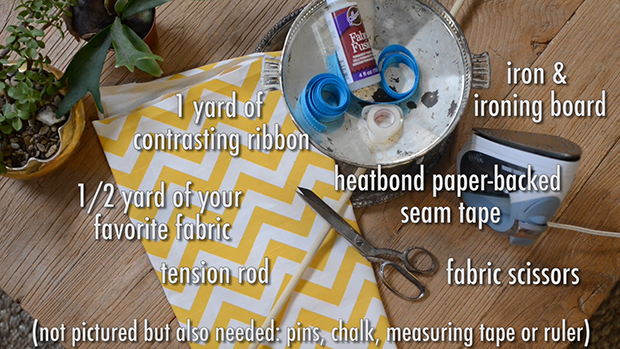
What you will need:
- Measuring tape or ruler
- ½ yd. of your favorite fabric
- Chalk
- Fabric scissors
- Iron and ironing board
- Heatbond paper-backed seam tape
- 1 yd. of contrasting ribbon
- Pins
- Tension or dowel rod
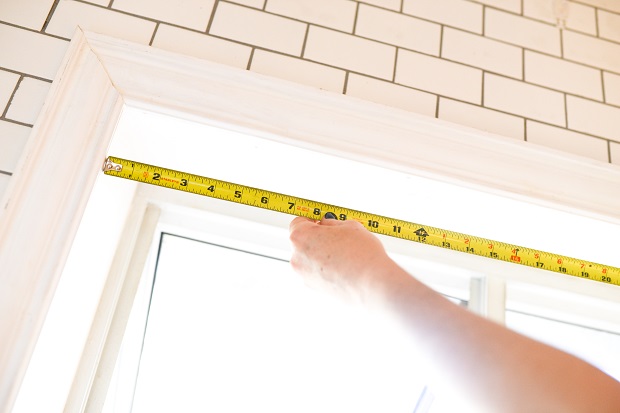

Step 1
Measure the inside width and height of the window frame where you plan to hang the curtain. Add 1 inch to the width measurement. Then, divide the height measurement by three and add 2½ inches to that number. That’s how big your fabric needs to be. (For example, for a 24-by-36-inch window, the fabric measurement would be 25 inches wide and 14½ inches long.)
Lay the fabric facedown on a clean, flat surface and use chalk to mark cut lines.
Use fabric scissors and cut smoothly and carefully.
Step 2
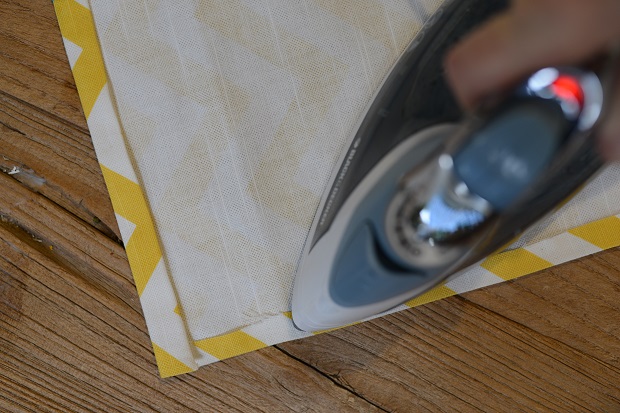
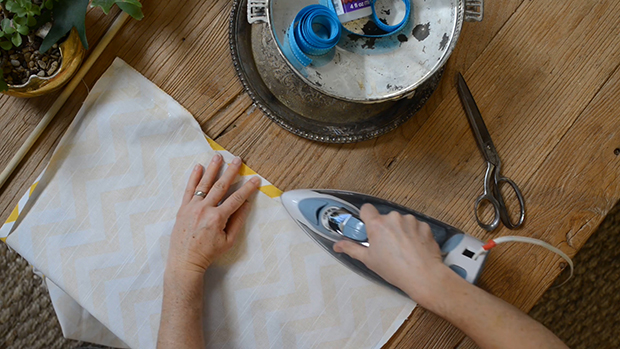
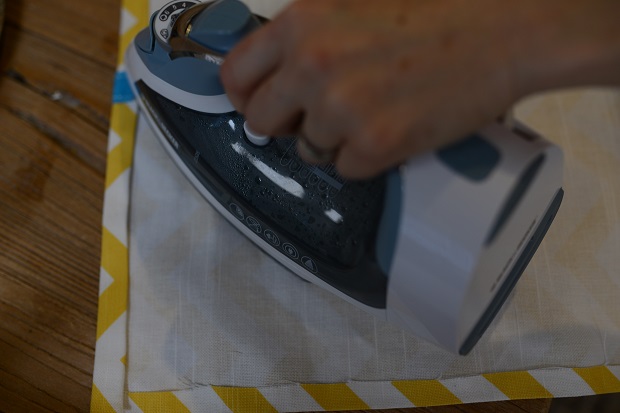
With the material facedown, start on the top edge of the fabric and fold the edge over ½ inch. Press with the iron to crease. Repeat for each edge of the fabric.

Step 3
Cut a piece of seam tape the length of the side edges of the fabric. Lift open the right edge crease and place the seam tape inside the fold, paper side up. Iron the seam tape just enough for the glue on the underside of the paper to melt and bond to the fabric. Let cool slightly and pull off the paper tape. Close the fold over the tape and iron again to bond the fold.
Repeat on the left edge, followed by the top and bottom edges. (Hint: If the top and bottom folds feel too bulky, cut a diagonal notch out of the corners to reduce the amount of fabric inside the fold.)
Return to the top edge of the fabric. Cut a piece of seam tape the width of the fabric and bond it to the backside of the top fold using the same method as above.
Step 4
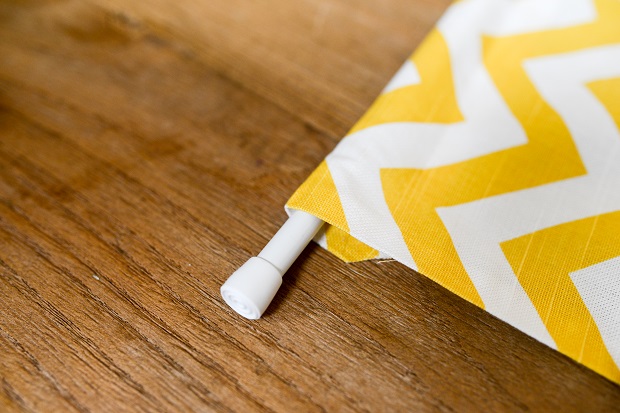
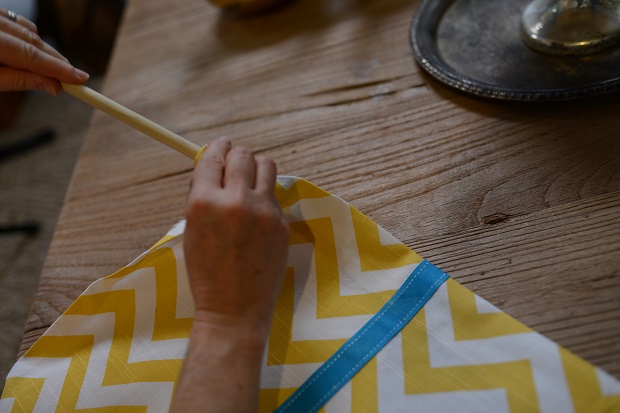
Fold fabric over 1-2 inches to accommodate the size of the tension rod. Check to make sure your rod will slide easily into the pocket you’re about to create. Remove the seam tape’s paper backing and, using the iron, bond the fold.
Turn to the bottom edge. You can leave the bottom hem as a single fold or add a little more finish by giving it a second fold. To do so, use your iron to bond a piece of seam tape to the back of your first fold. Pull off the tape’s paper backing, fold it over a second time and use the iron to bond it in place. Use your scissors to notch out any bulky fabric in the edges of the fold.

Step 5
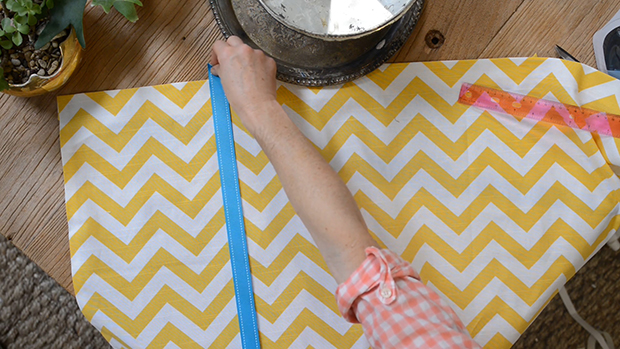
Flip your curtain over so that the print faces up. Measure 6 inches in from the left edge and make a chalk mark at the top and bottom of the curtain. Repeat on the right side.
Step 6
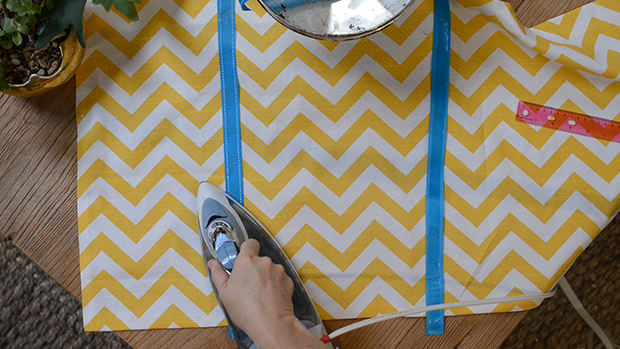
Cut two pieces of ribbon 1 inch longer than the length of your curtain. Iron a piece of seam tape to the back of each piece of ribbon and remove the paper.
Step 7
Starting with the left edge of your curtain, lay the ribbon in line with the vertical marks, making sure the ribbon overlaps the top and bottom of the curtain by ½ inch each. Pin the ribbon in place. Use the iron to bond the ribbon to the curtain fabric. Remove the pins.
Step 8
Flip the curtain over, fold the tail ends of the ribbon onto the backside of the curtain, and bond them in place with the iron. Repeat steps 7 and 8 on the right edge of the curtain, bonding the ribbon in place on the front before bonding the ends to the back.
Step 9
Slide the tension or dowel rod through the pocket you created, and you’re ready to hang up your no-sew curtains!