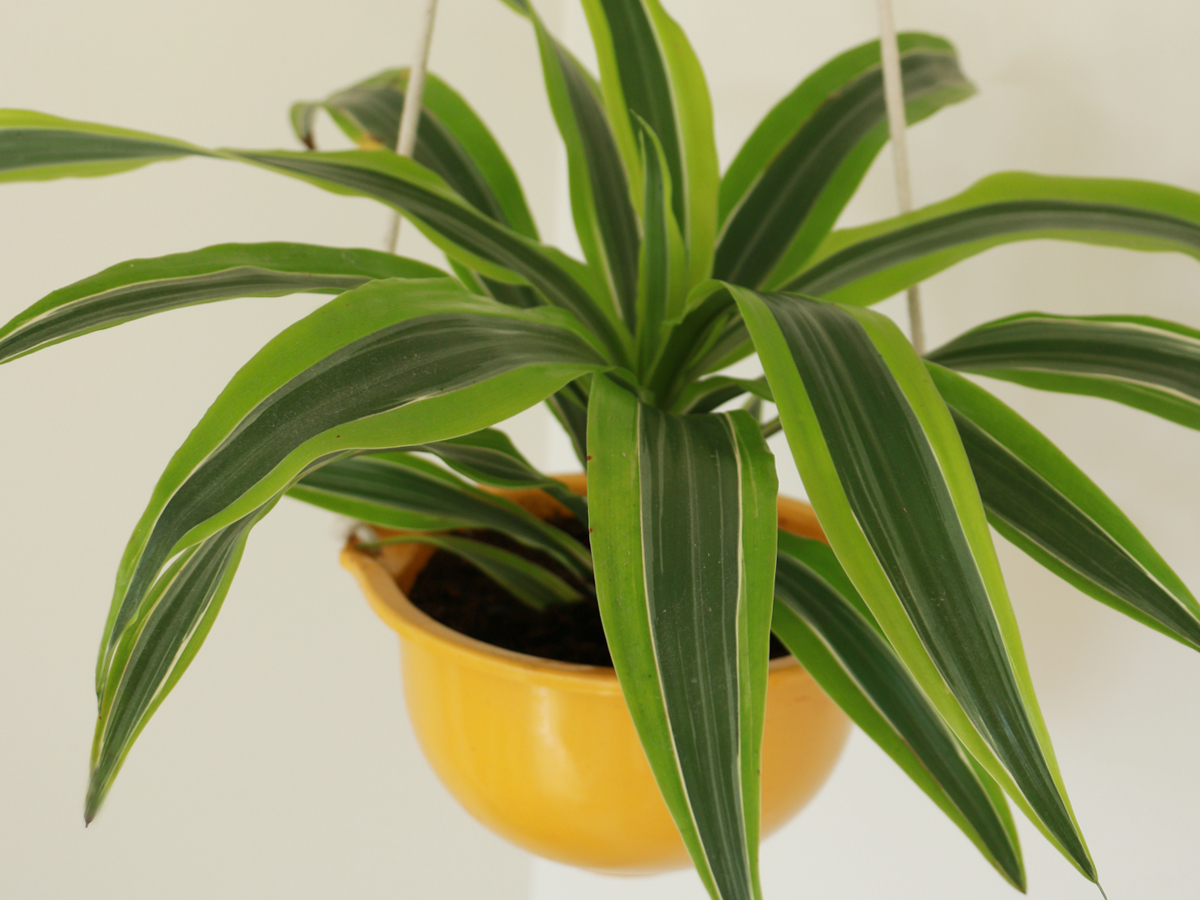
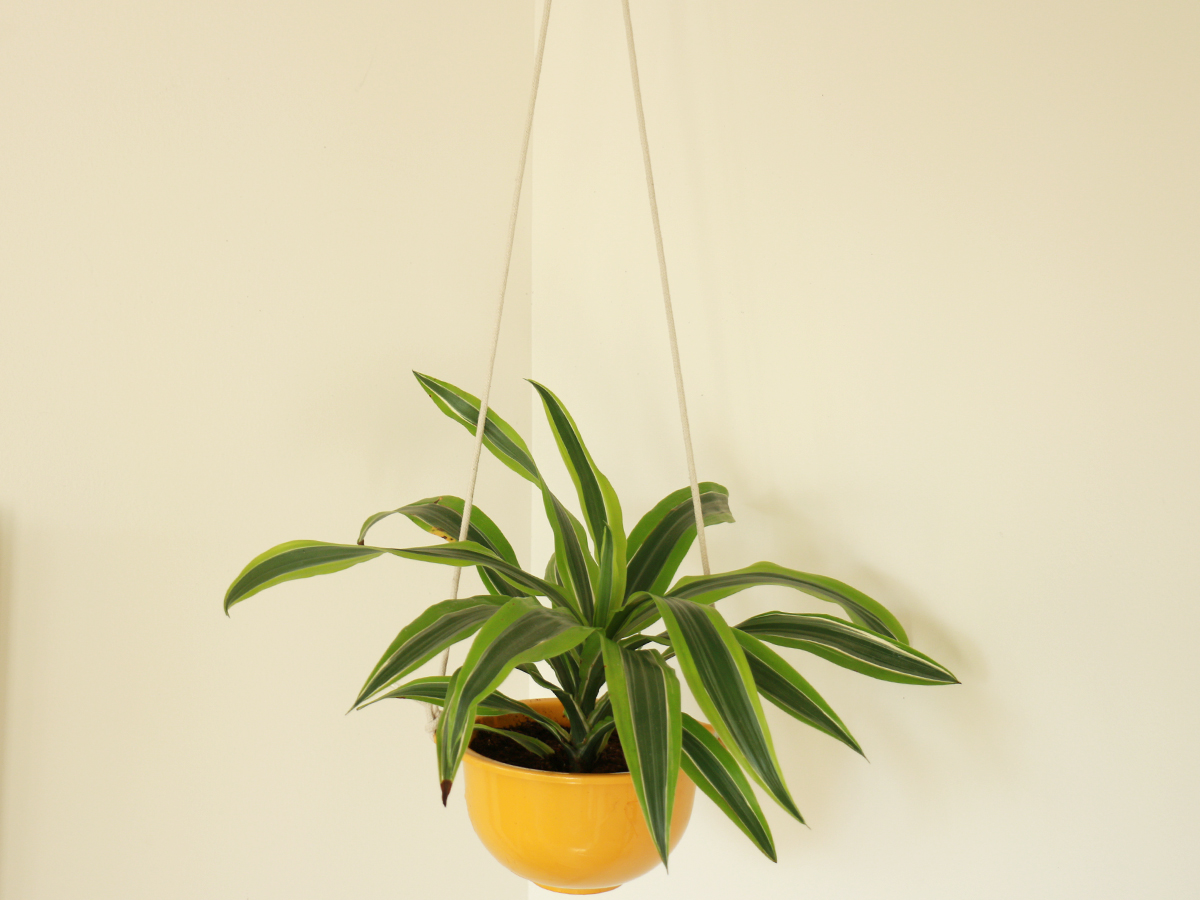
How to Make an Easy DIY Hanging Planter
Most of us have outdated or mismatched containers in our kitchen. Instead of tossing them, you can turn them into beautiful hanging planters in just a few easy steps. Using a few simple items — most of which you probably have on-hand — you can upcycle those old bowls and update your home decor to boot.
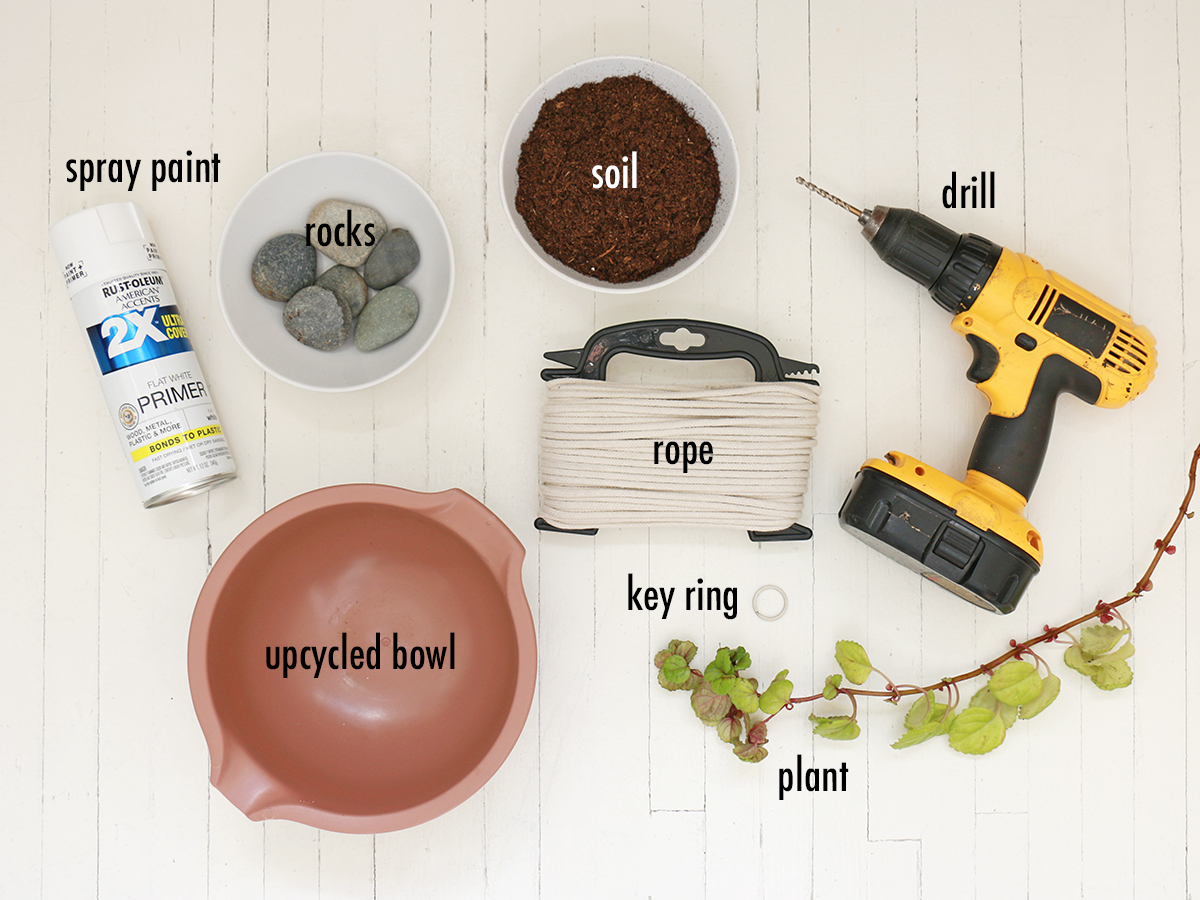
Materials:
- Kitchen bowl, container, or colander
- Drill with 3/16” bit
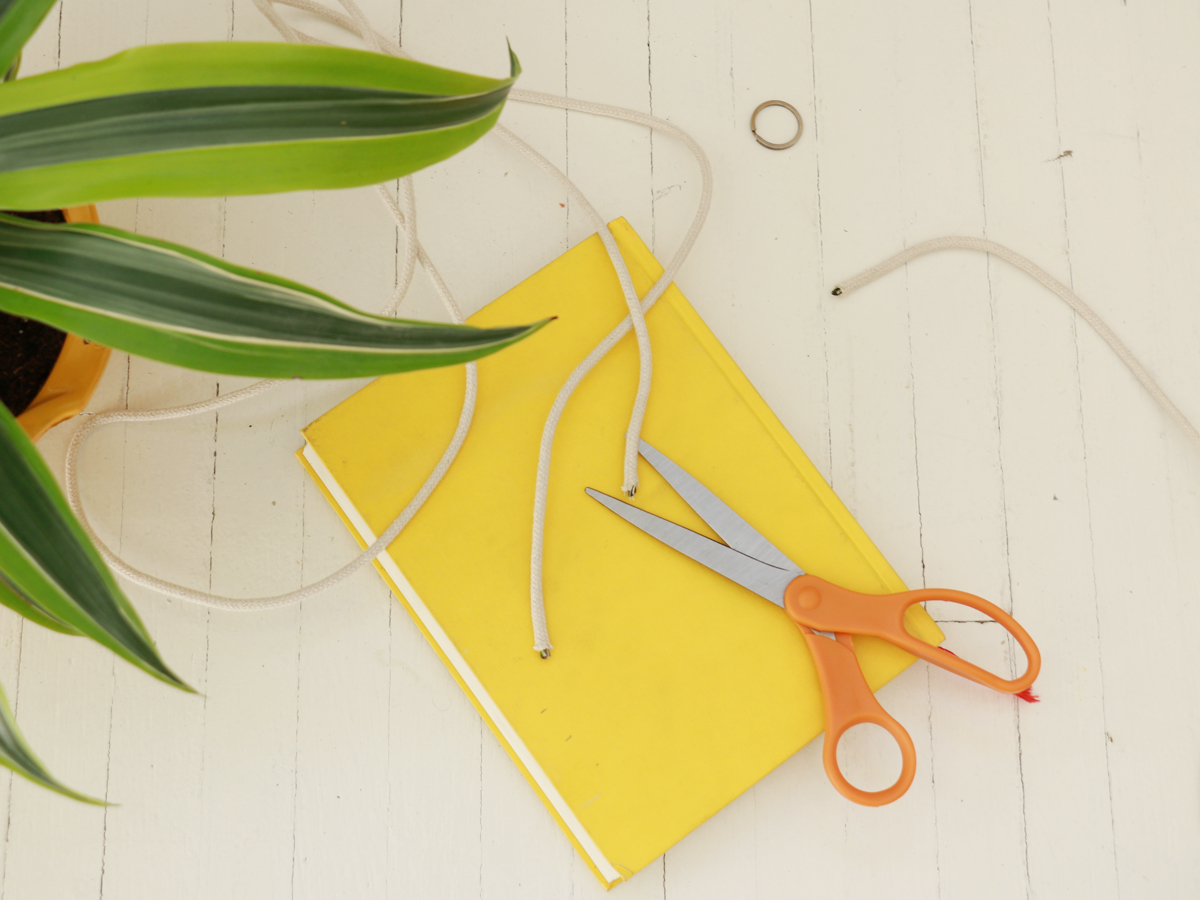
- Rope or heavy-duty twine
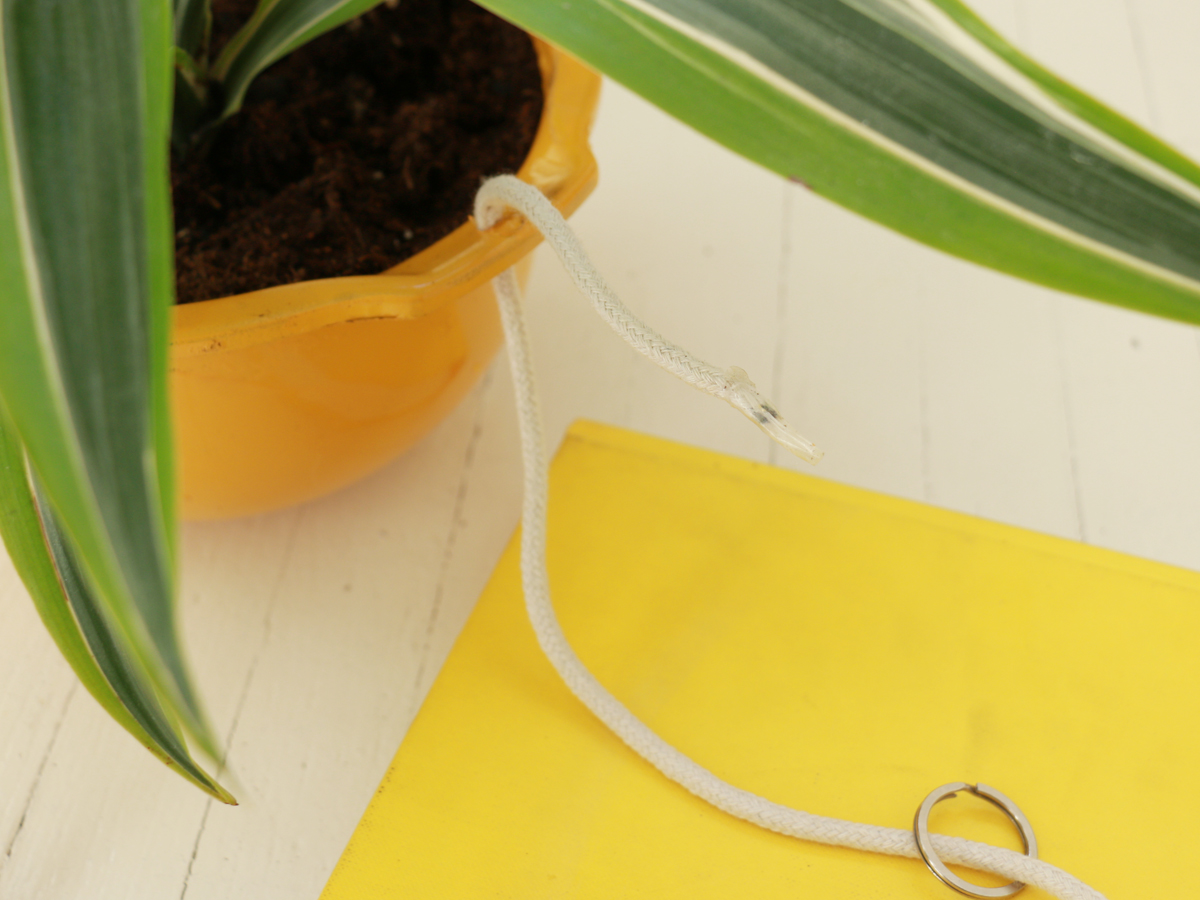
- Key ring
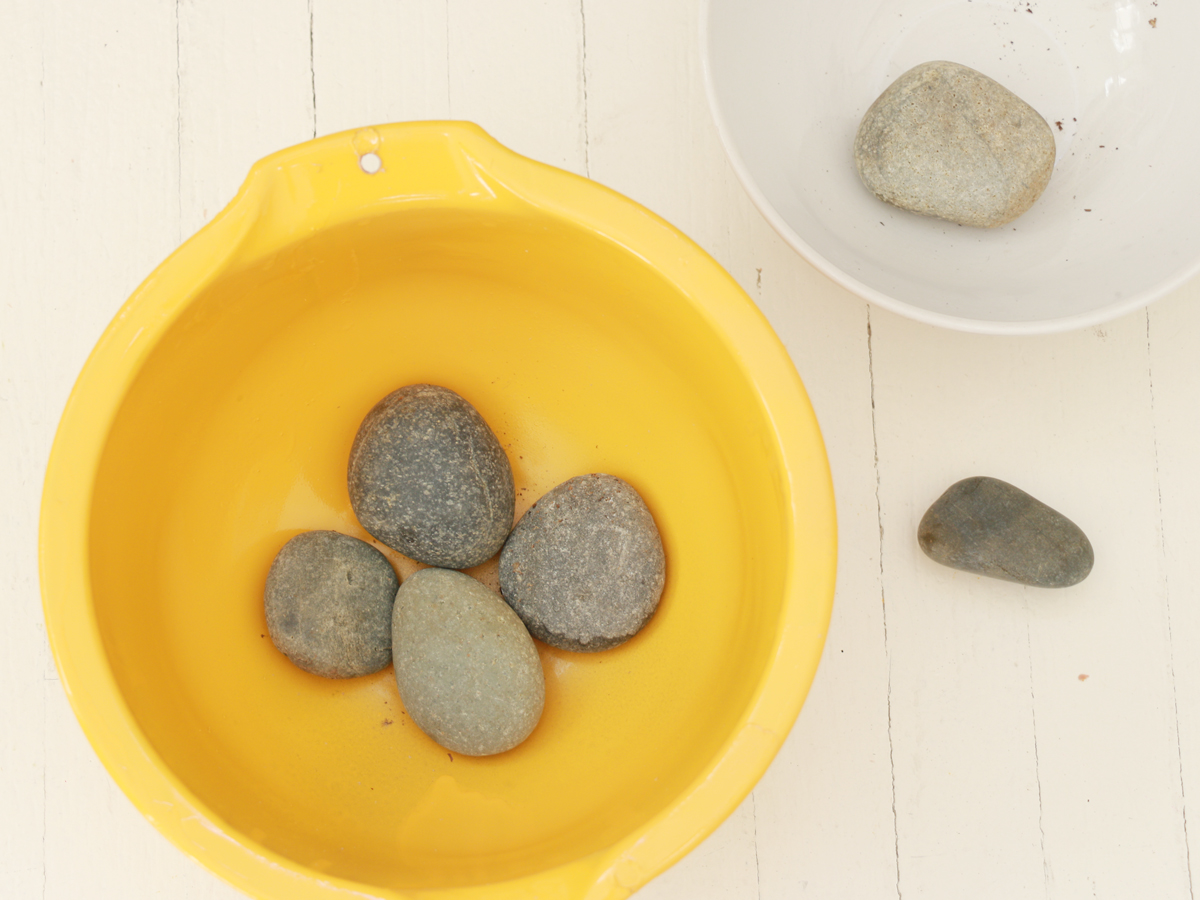
- Rocks
- Soil
- Small plant
- Optional: Spray paint
- Not pictured: Scissors
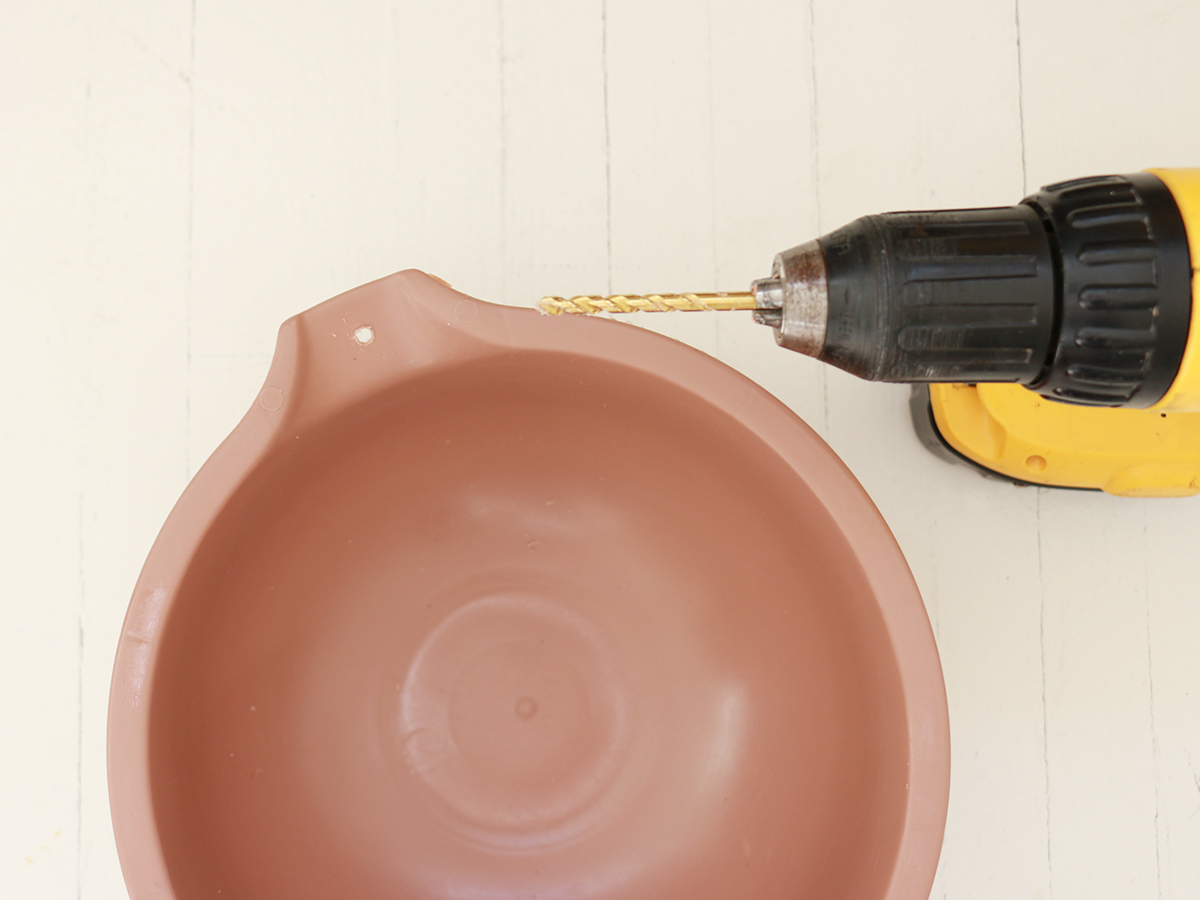
Step 1
Using a drill with a 3/16” bit, drill two equidistant holes into the sides of your container, 1 inch down from the rim. If you’re using a bowl with handles, drill a hole into the center of each handle.
If you intend to hang your planter outside, also drill one hole into the bottom of the container to allow for drainage.
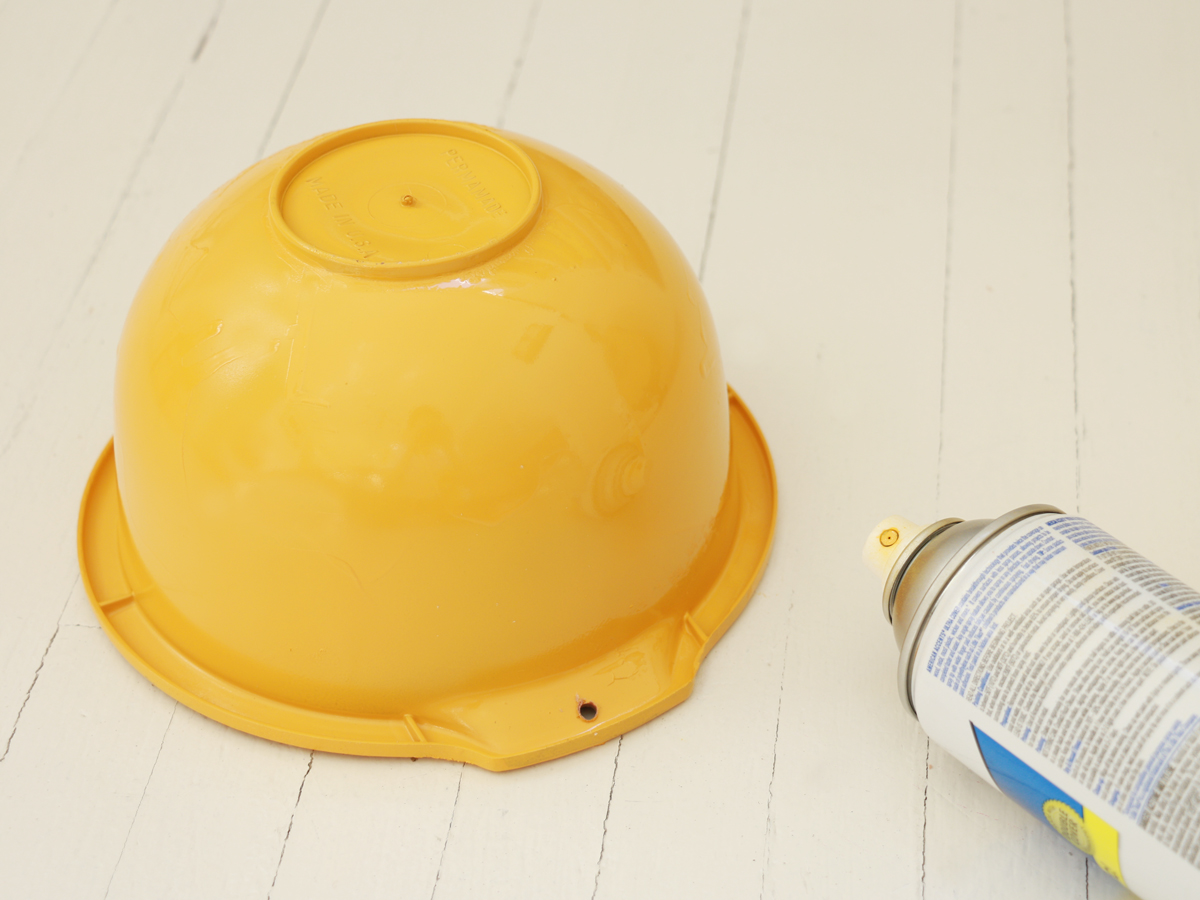
Step 2 (optional)
If your container needs sprucing up, try adding some color. Spray paint the outside and inner rim. No need to perfectly paint the interior of your container, as that won’t be visible once the planter is filled.
Step 3
For indoor planters, it’s important to add a few rocks to help promote drainage. If you don’t have any rocks, pebbles or coarse sand will also do the trick.

Step 4
Add a couple of cups of soil to your container, gently add in your plant, and then pour in additional soil until your plant is securely positioned in place.

Step 5
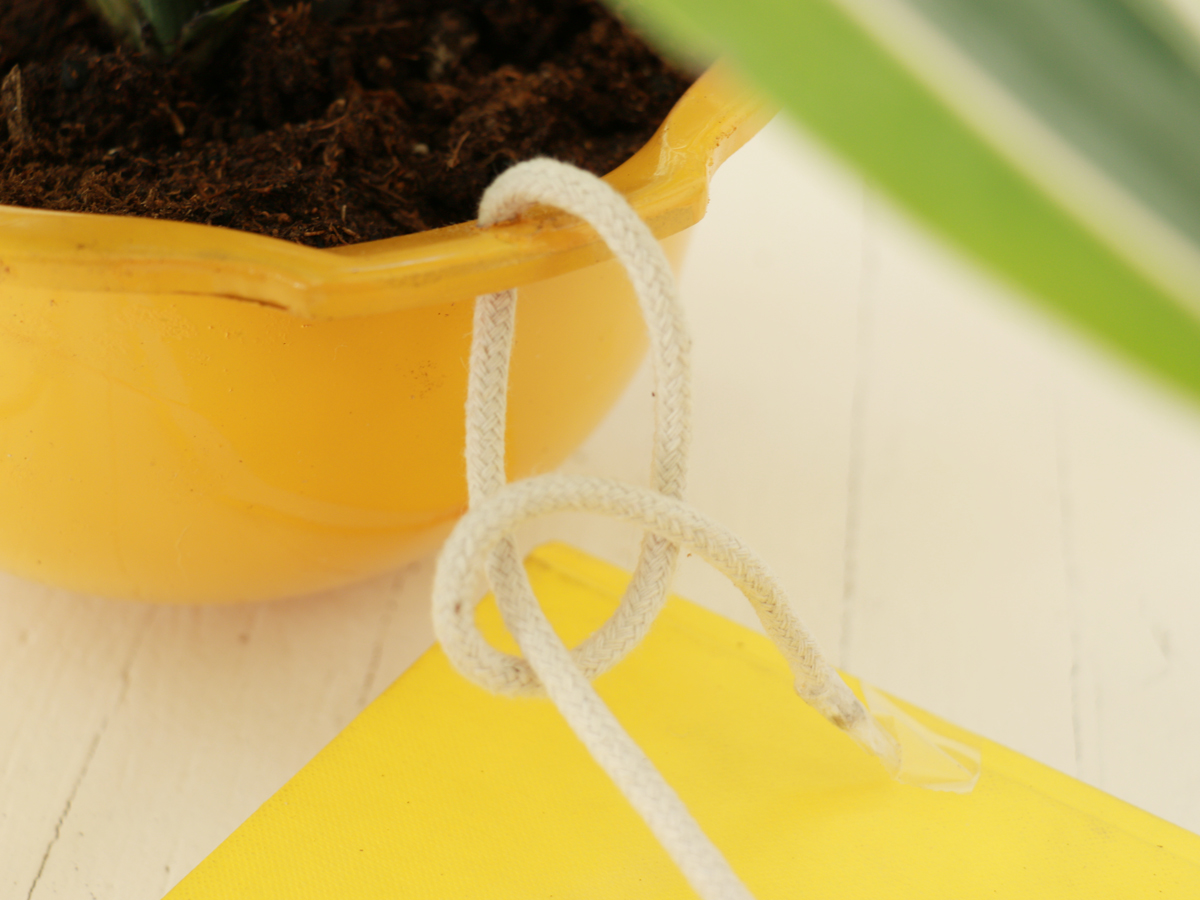
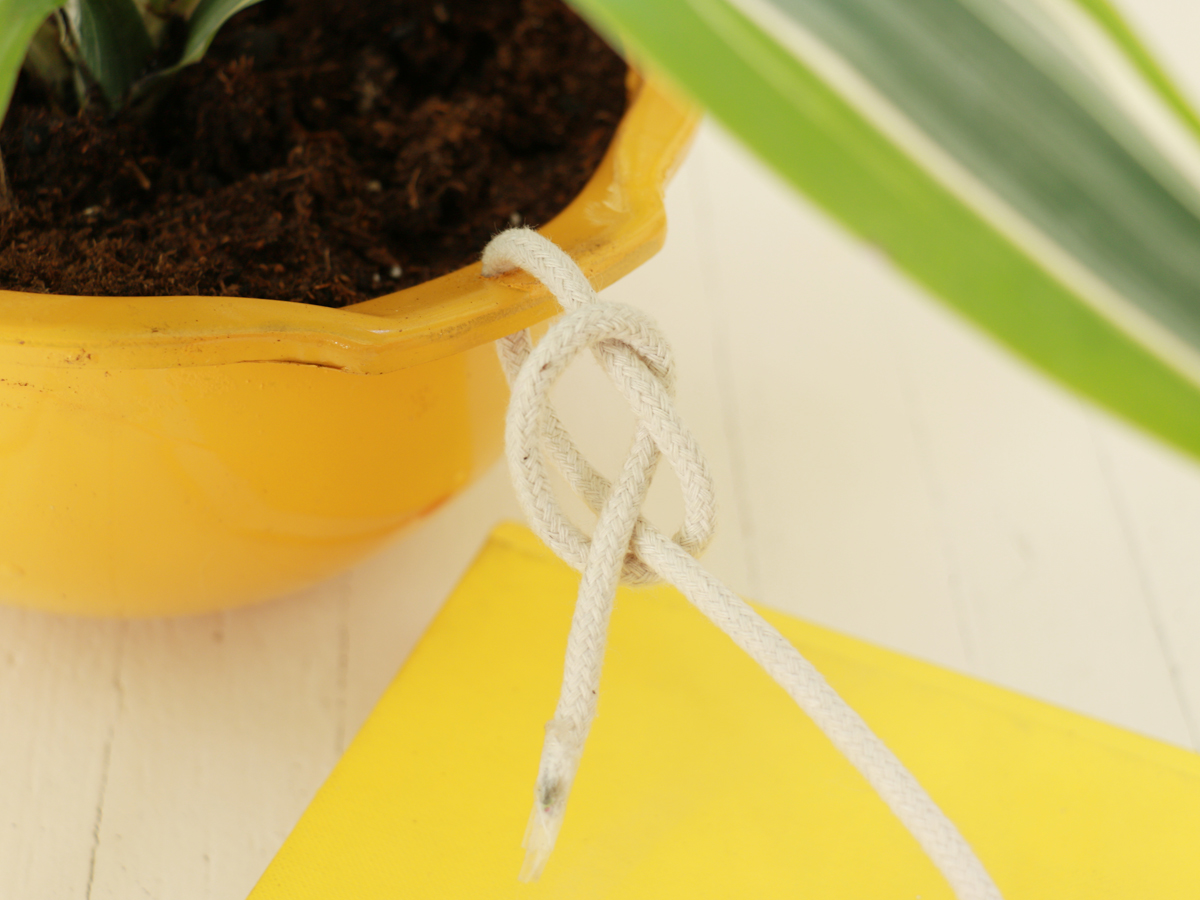
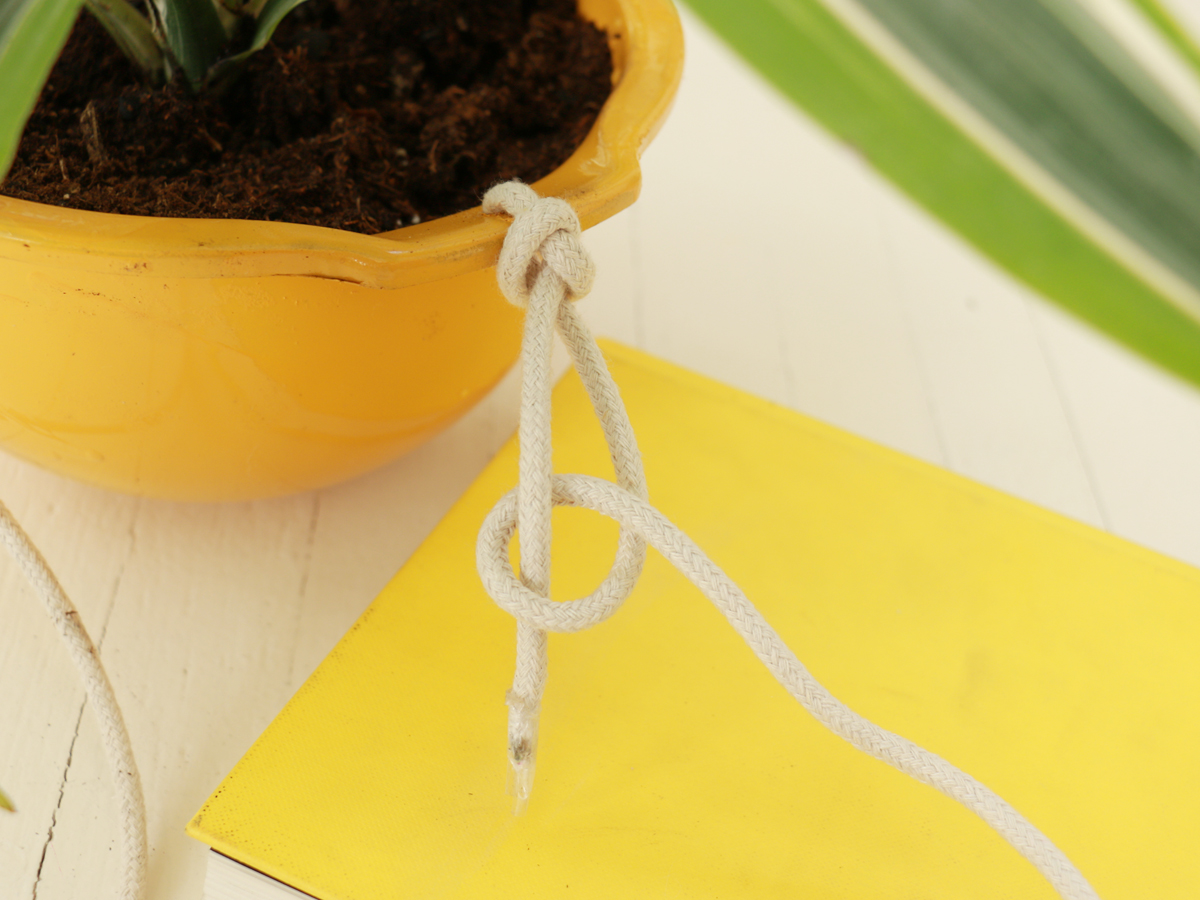
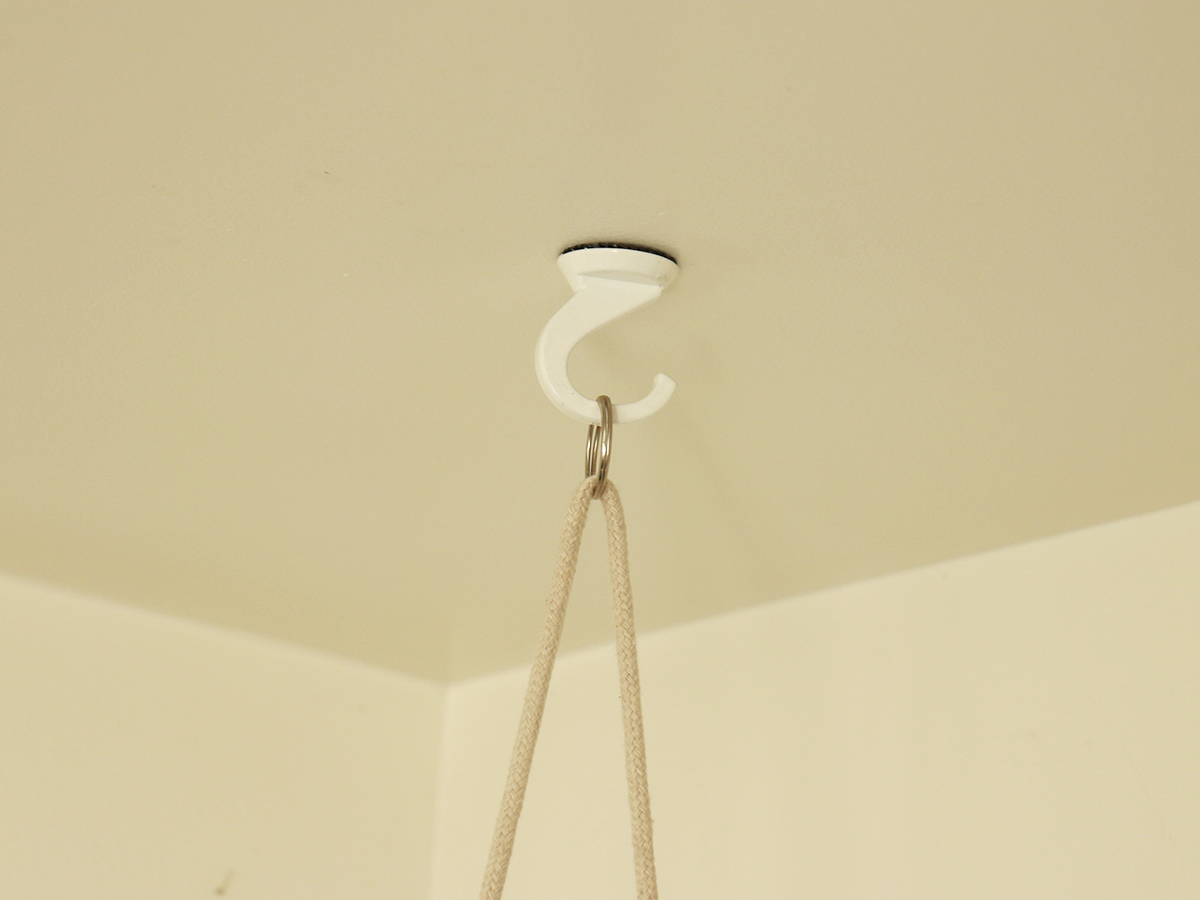
Cut a piece of rope approximately 5 feet in length. String a key ring through the rope, then knot the ends through the holes you drilled in step 1. We went with a butcher’s knot to keep our rope secure. You can follow along with the images of the knot provided; however, any sturdy knot will work.
Step 6
Once your knots have been made, your planter is ready to hang. Use the key ring to hang the planter to a ceiling hook or nail. And don’t forget to water it when needed!